Publishing to PyPI with a Trusted Publisher from GitLab CI/CD
Posted on
PyPA’s Trusted Publishers let you upload Python packages directly from your CI pipeline to PyPI. And you don’t need any long-lived secrets like API tokens. This makes uploading Python packages not only easier than ever and more secure, too.
In this article, we’ll look at what Trusted Publishers are and how they’re more secure than using API tokens or a username/password combo. We’ll also learn how to set up our GitLab CI/CD pipeline to:
- continuously test the release processes with the TestPyPI on every push to
main, - automatically perform PyPI releases on every Git tag, and
- additionally secure the process with GitLab (deployment) environments.
The official documentation explains most of this, but it doesn’t go into much depth regarding GitLab pipelines and leaves a few details unexplained.
Why should I want to use this?
API tokens aren’t inherently insecure, but they do have a few drawbacks:
- If they are passed as environment variables, there’s a chance they’ll leak (think of a debug
env | sortcommand in your pipeline). - If you don’t watch out, bad co-maintainers can steal the token and do mischief with it.
- You have to manually renew the token from time to time, which can be annoying in the long run.
Trusted Publishers can avoid these problems or, at the very least, reduce their risk:
- You don’t have to manually renew any long-lived tokens.
- All tokens are short-lived. Even if they leak, they can’t be misused for long.
After we’ve learned how Trusted Publishers and protected GitLab environments work, we will take another look at security considerations.
How do Trusted Publishers work?
The basic idea of Trusted Publishers is quite simple:
- In PyPI’s project settings, you add a Trusted Publisher and configure it with the GitLab URL of your project.
- PyPI will then only accept package uploads if the uploader can prove that the upload comes from a CI pipeline of that project.
The technical process behind this is based on the OpenID Connect (OIDC) standard.
Essentially, the process works like this:
- In your CI pipeline, you request an ID token for PyPI.
- GitLab injects the short-lived token into your pipeline as a (masked) environment variable. It is cryptographically signed by GitLab and contains, among other things, your project’s path with namespace.
- You use this token to authenticate with PyPI and request another token for the actual package upload.
- This API token can now be used just like “normal” project-scoped API tokens.
The Trusted Publishers documentation explains this in more detail.
One problem remains, though: An ID token can be requested in any pipeline job and in any branch. Malicious contributors could sneak in a pipeline job and make a corrupted release.
This is where environments come in.
Environments
GitLab environments represent your deployed code in your infrastructure. Think of your code running in a container in your production or testing Kubernetes cluster; or your Python package living on PyPI. :-)
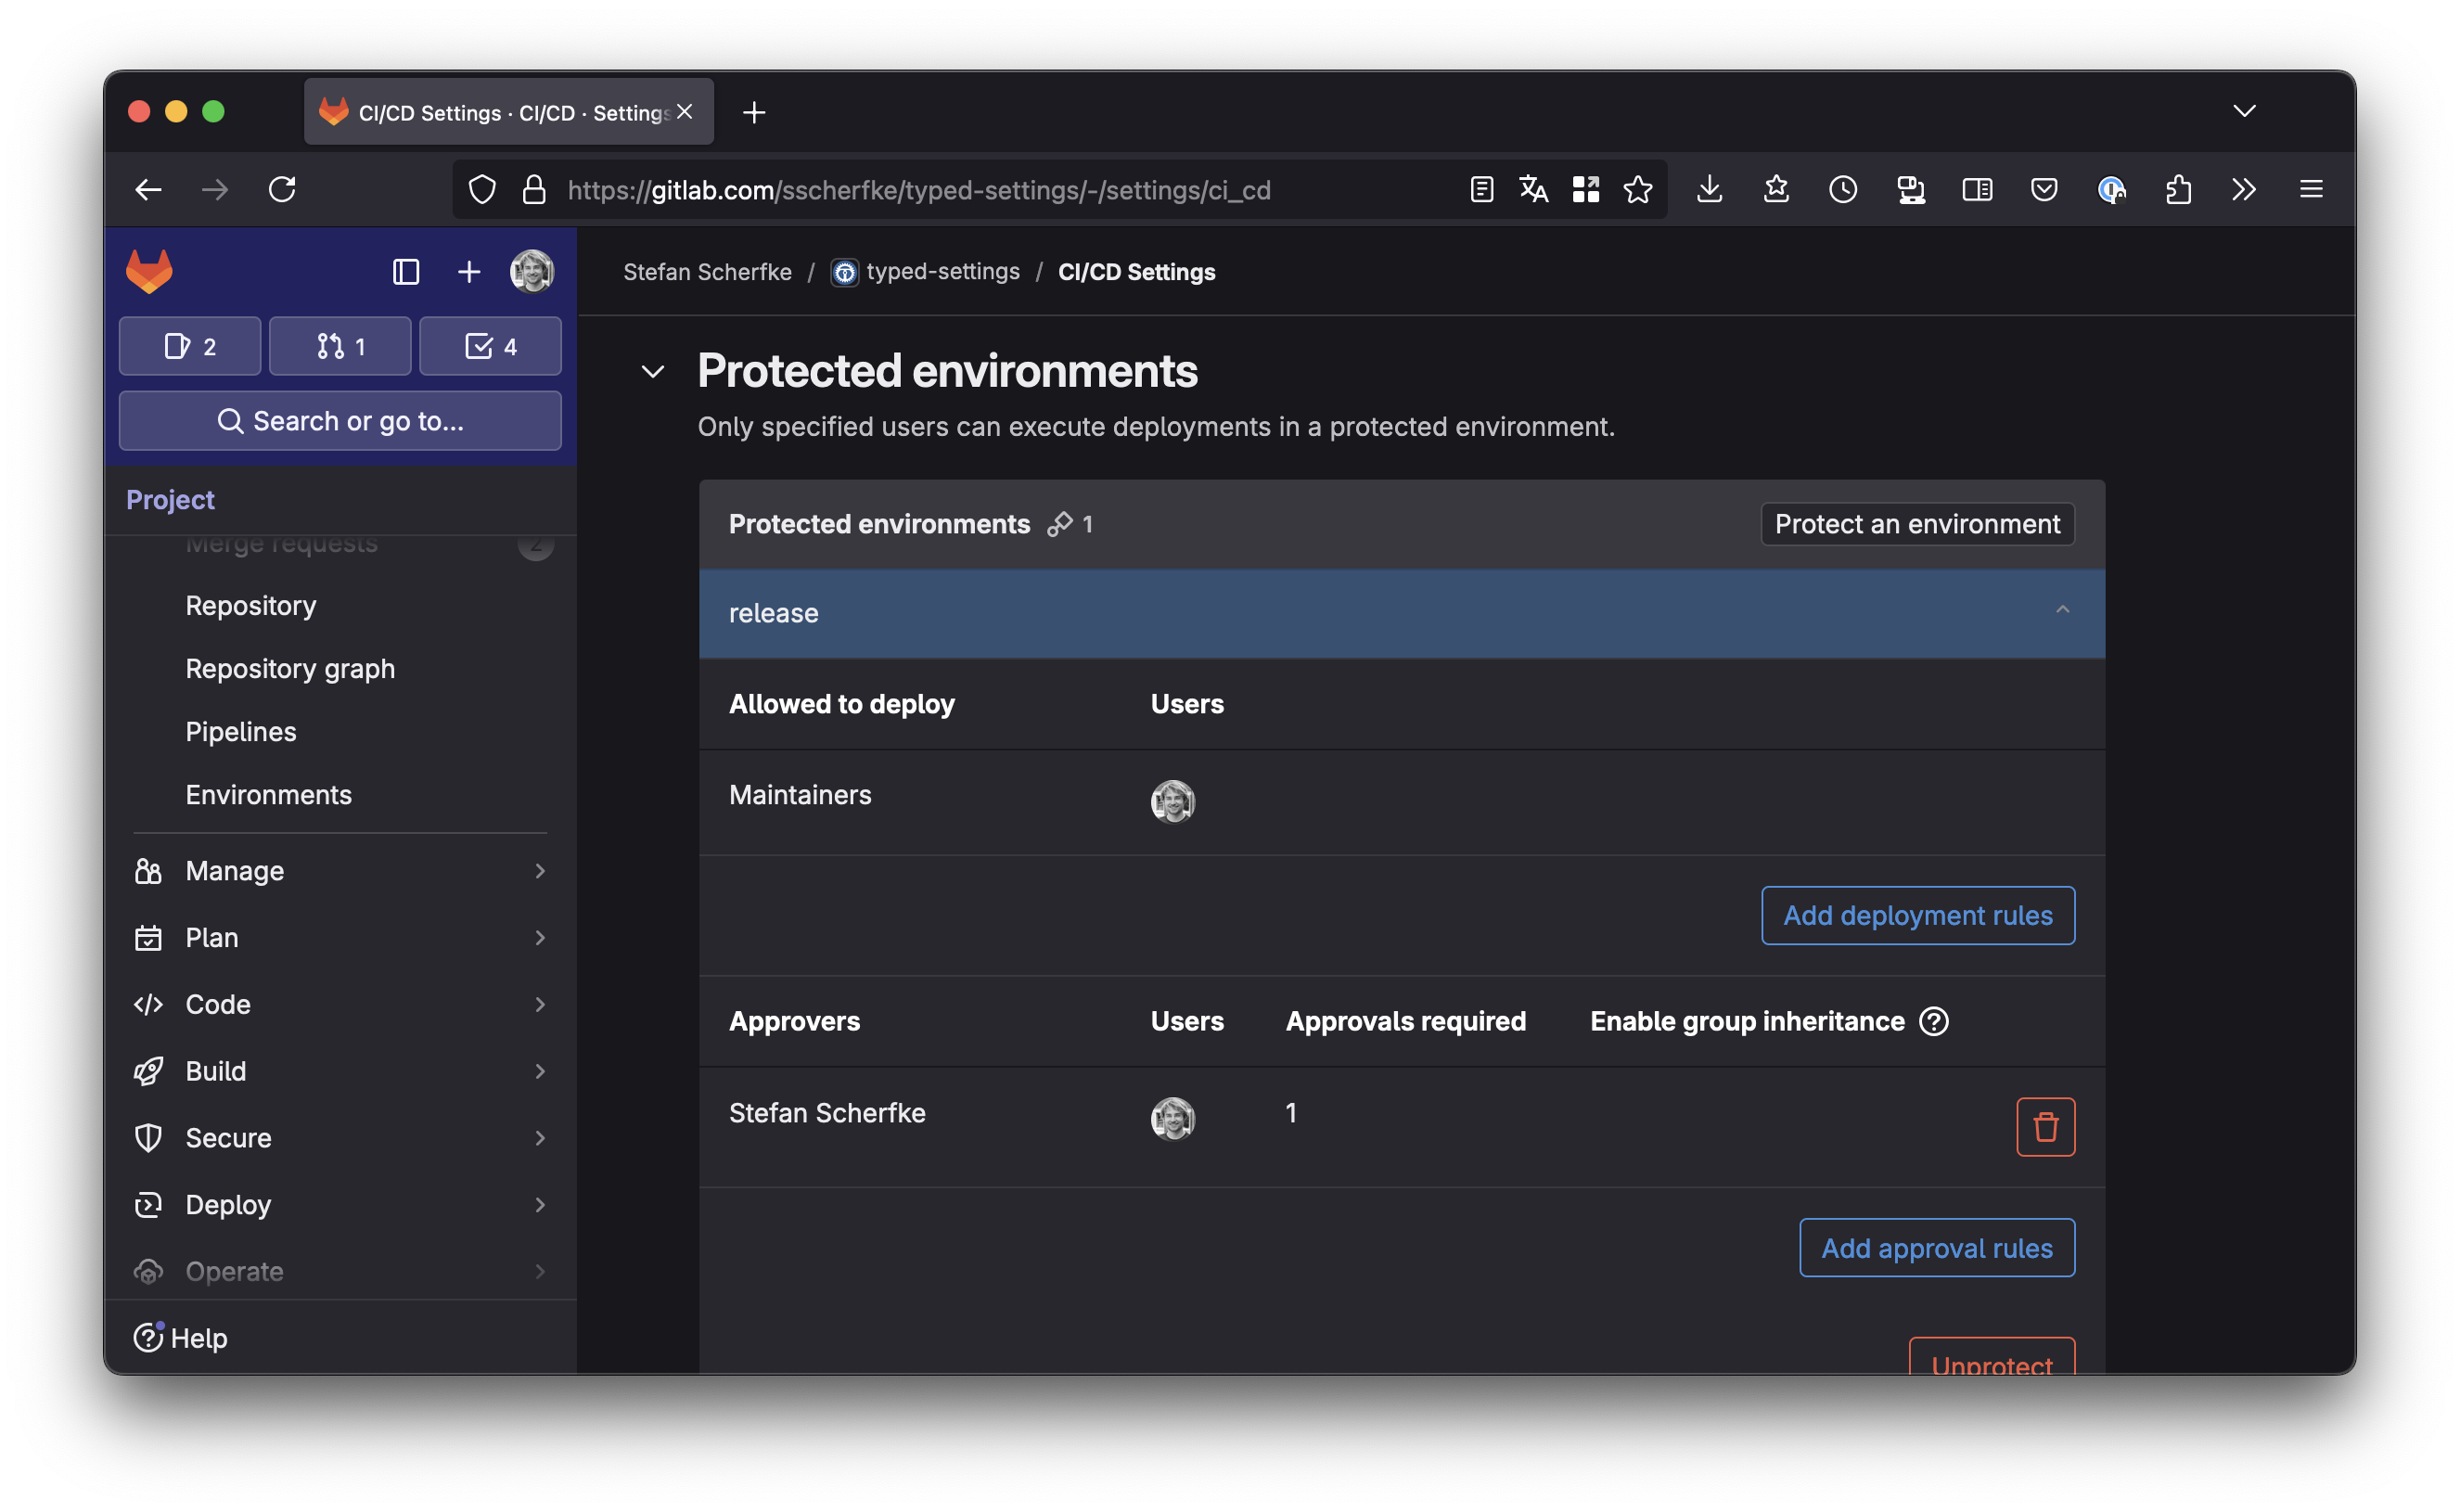
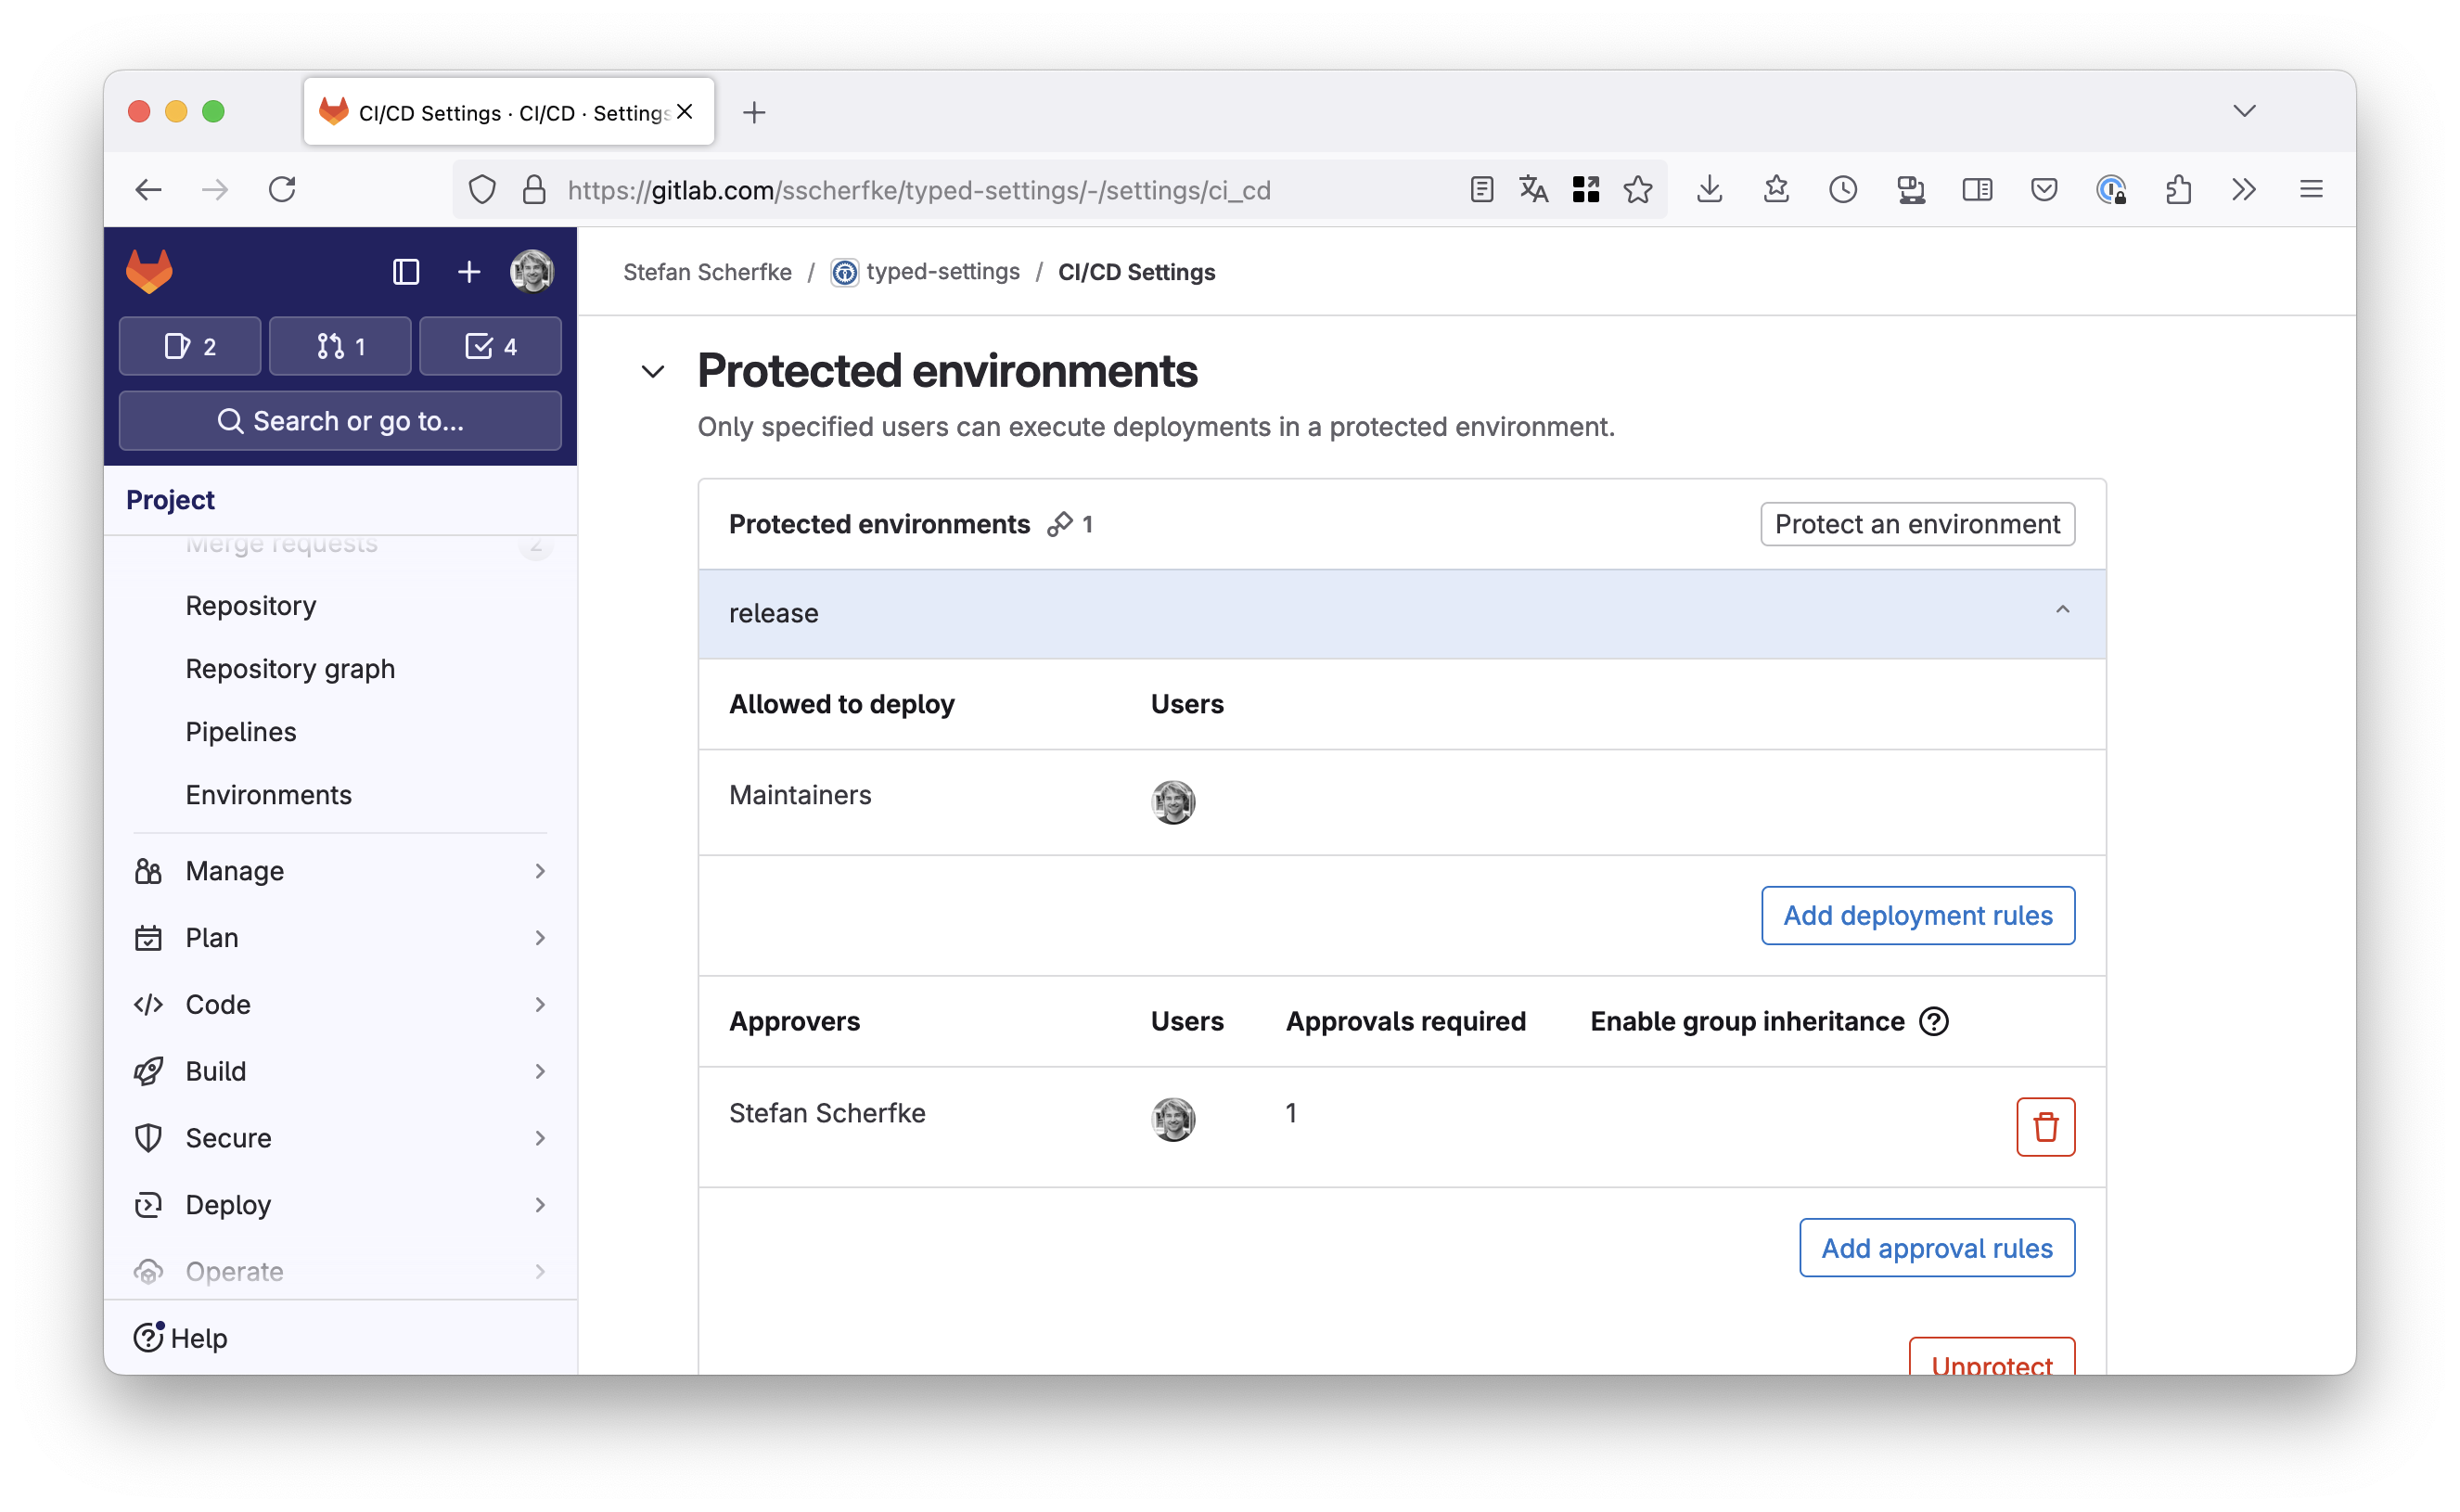
The most important feature of environments in this context is access control: You can protect environments, restricting deployments to them. For protected environments, you can define users or roles that are allowed to perform deployments and that must approve deployments. For example, you could restrict deployments (uploads to PyPI) to all maintainers of your project, but only after you yourself have approved each release.
To use an environment in your CI/CD pipeline,
you need to add it to a job in the .gitlab-ci.yml.
If we also store the name of the environment in the PyPI deployment settings, only uploads from that environment will be allowed, i.e. only uploads that have been authorized by selected people.
Security Considerations
The last two sections have already hinted at this: GitLab environments are only truly secure if you can protect them.
Let’s take a step back and consider what threats we’re trying to protect against, so that we’ll then be able to choose the right approach:
- Random people doing a merge request for your project.
- Contributors with the developer role committing directly into your project.
- Co-maintainers with more permissions then a developer.
- A Jia Tan which you trust even more than the other maintainers.
What can we do about it?
- Code in other people’s forks doesn’t have access to your project’s CI variables nor can it request OIDC ID tokens in your project’s name. But you need to carefully review each MR!
- Contributors with only developer permissions can still request ID tokens.
If you cannot use protected environments,
using an API token stored in a protected CI/CD variable is a more secure approach.
You should also protect your
mainbranch and all tags (using the*pattern), so that devleopers only have access to feature branches. You’ll find it under Settings → Repository → Protected branches/tags. - Protected CI/CD variables do not protect you from malicious maintainers, though. Even if you only allow yourself to create tags, other maintainers still have access to protected variables. Protected environments with only a selected set of approvers is the most secure approach.
- If a very trusted co-maintainer becomes malicious, there’s very little you can do. Carefully review all commits and read the audit logs (Secure → Audit Events).
So that means for you:
- If you are the only maintainer of a small open source project, just use a Trusted Publisher with (unprotected) environments.
- If you belong to a larger project with multiple maintainers, consider applying for GitLab for Open Source and use a Trusted Publisher with a protected environment.
- If there are multiple contributors and you don’t have access to protected environments, use an API token stored in a protected CI/CD variable and try only grant developer permissions to contributors.
Putting it all together
Configuring your GitLab project to use a trusted publisher involves three main steps:
- Update your project’s publishing settings on PyPI and TestPyPI.
- Update the CI/CD settings for your GitLab project.
- Update your project’s
pyproject.tomland.gitlab-ci.yml.
PyPI Settings
Tell PyPI to trust your GitLab CI pipelines.
- Log in to PyPI and go to your account’s Publishing settings. Here, you can manage and add trusted publishers for your project.
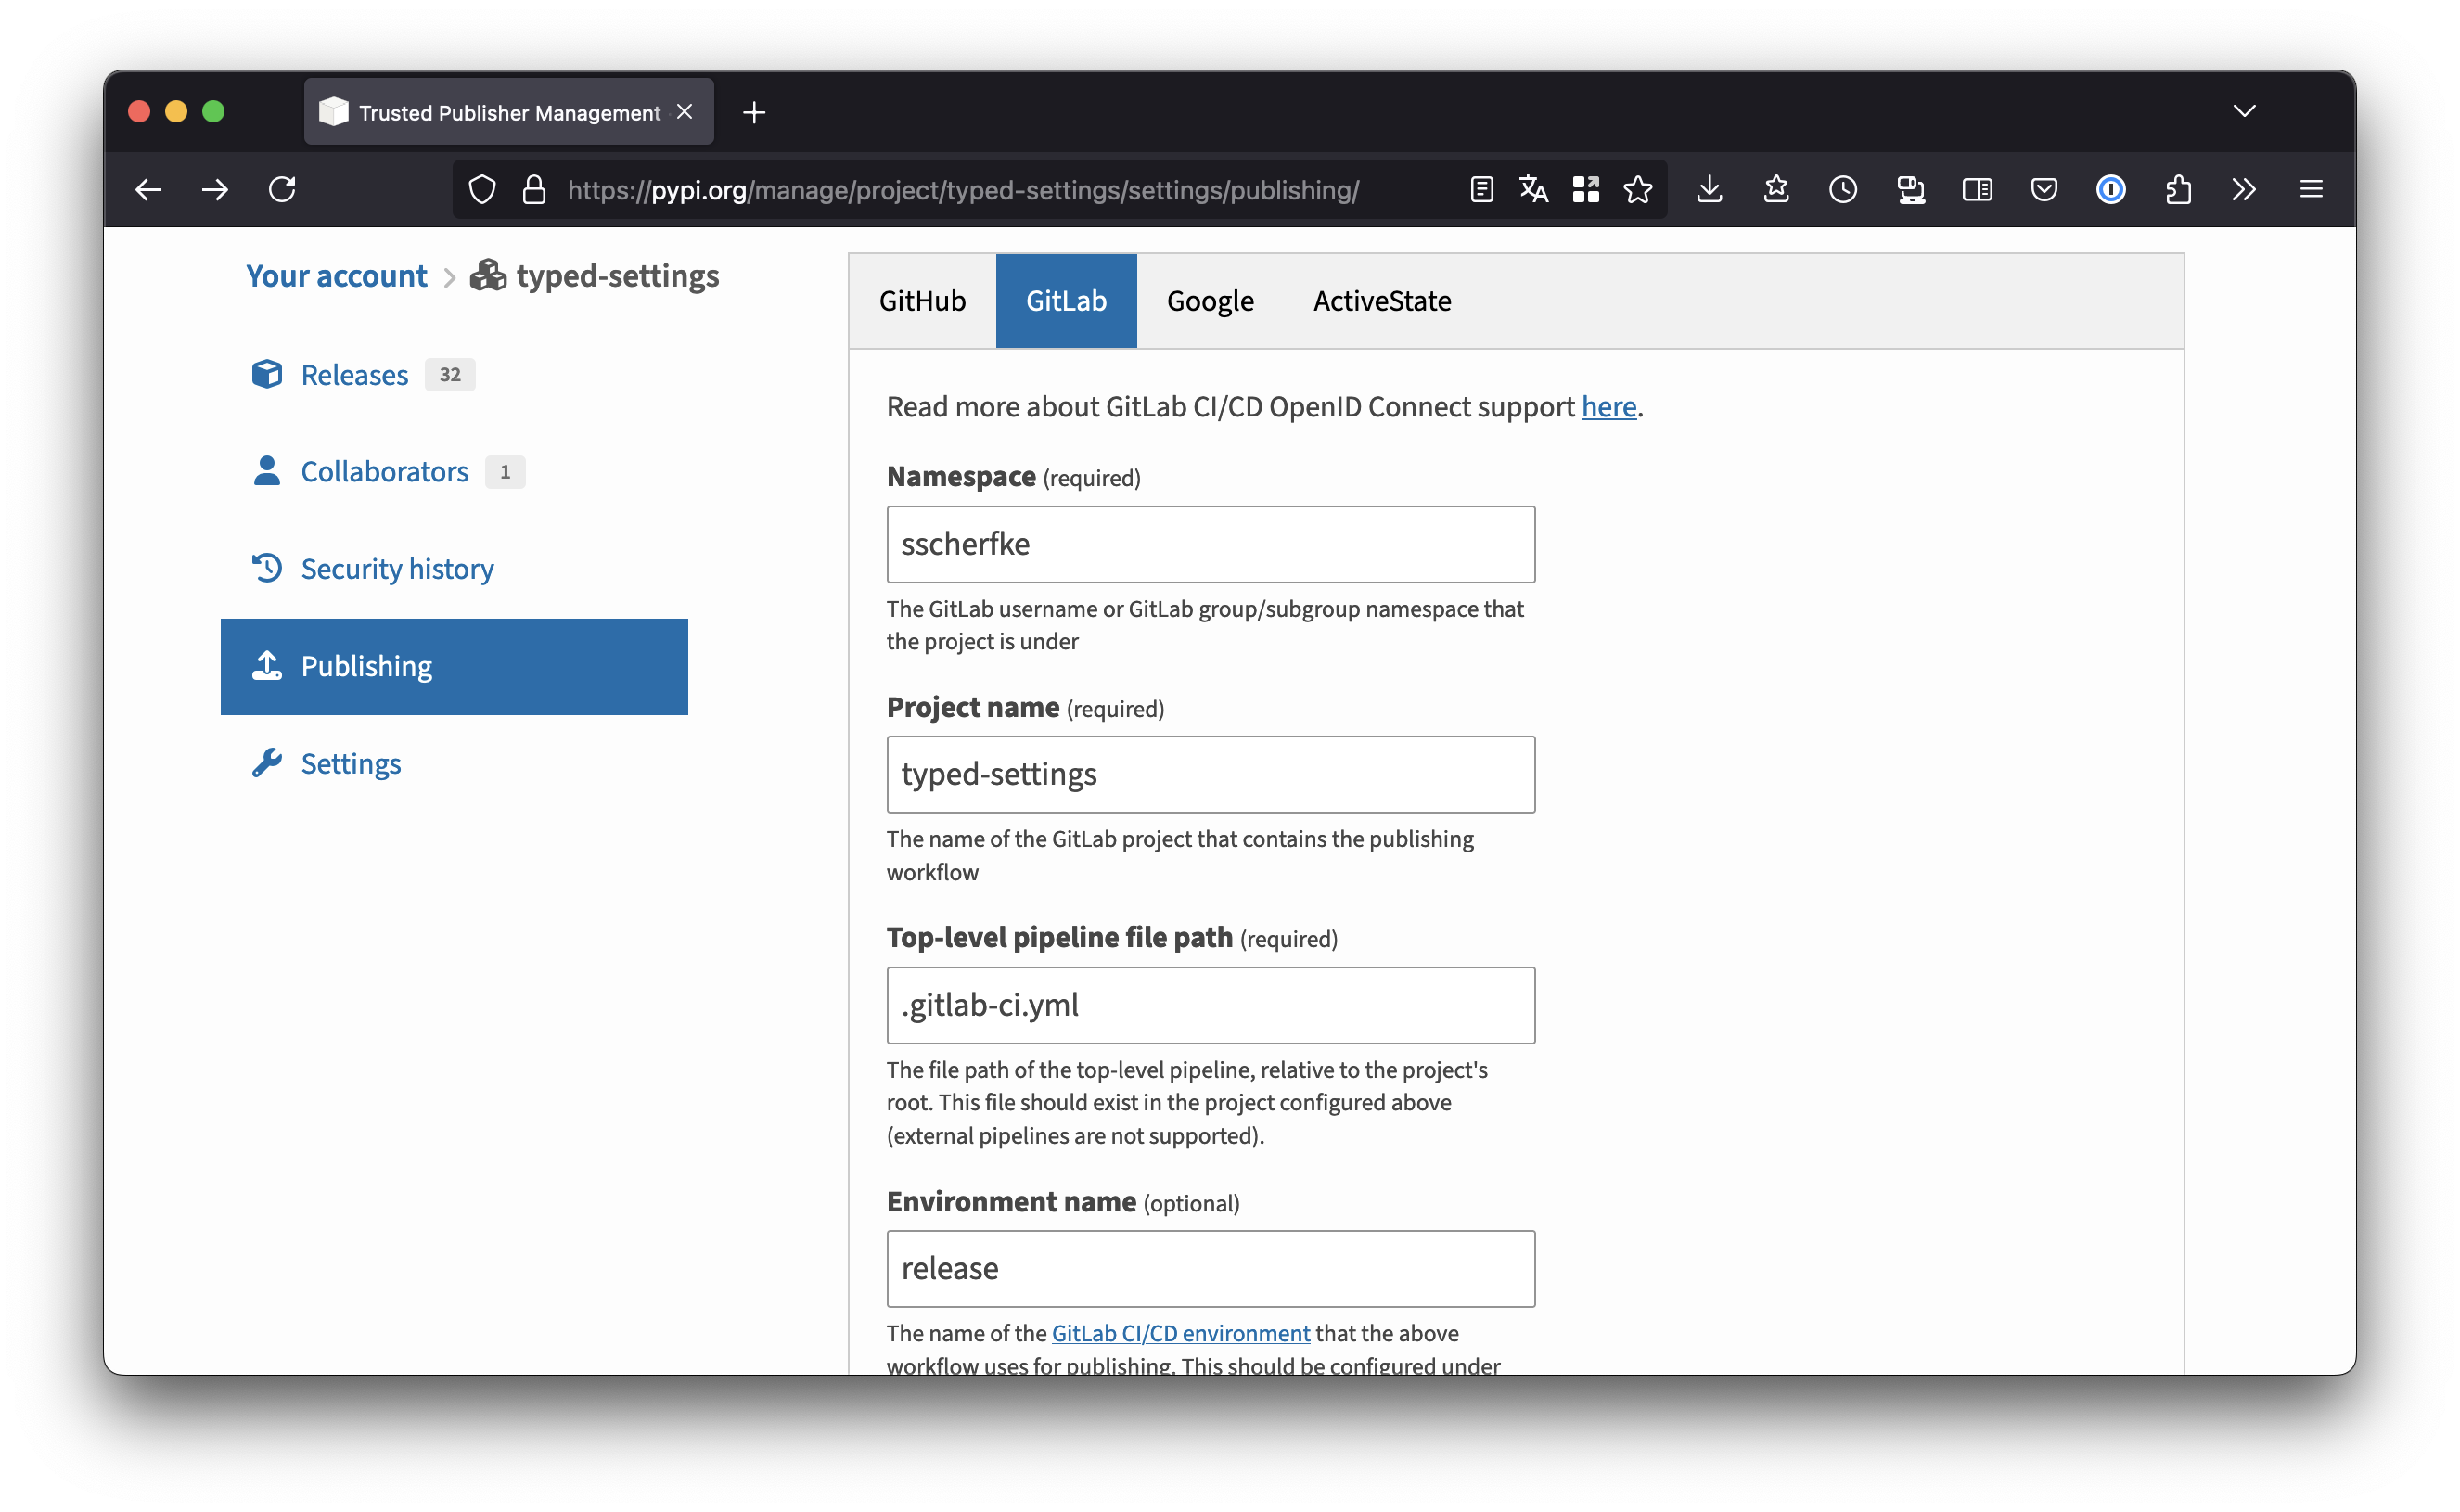
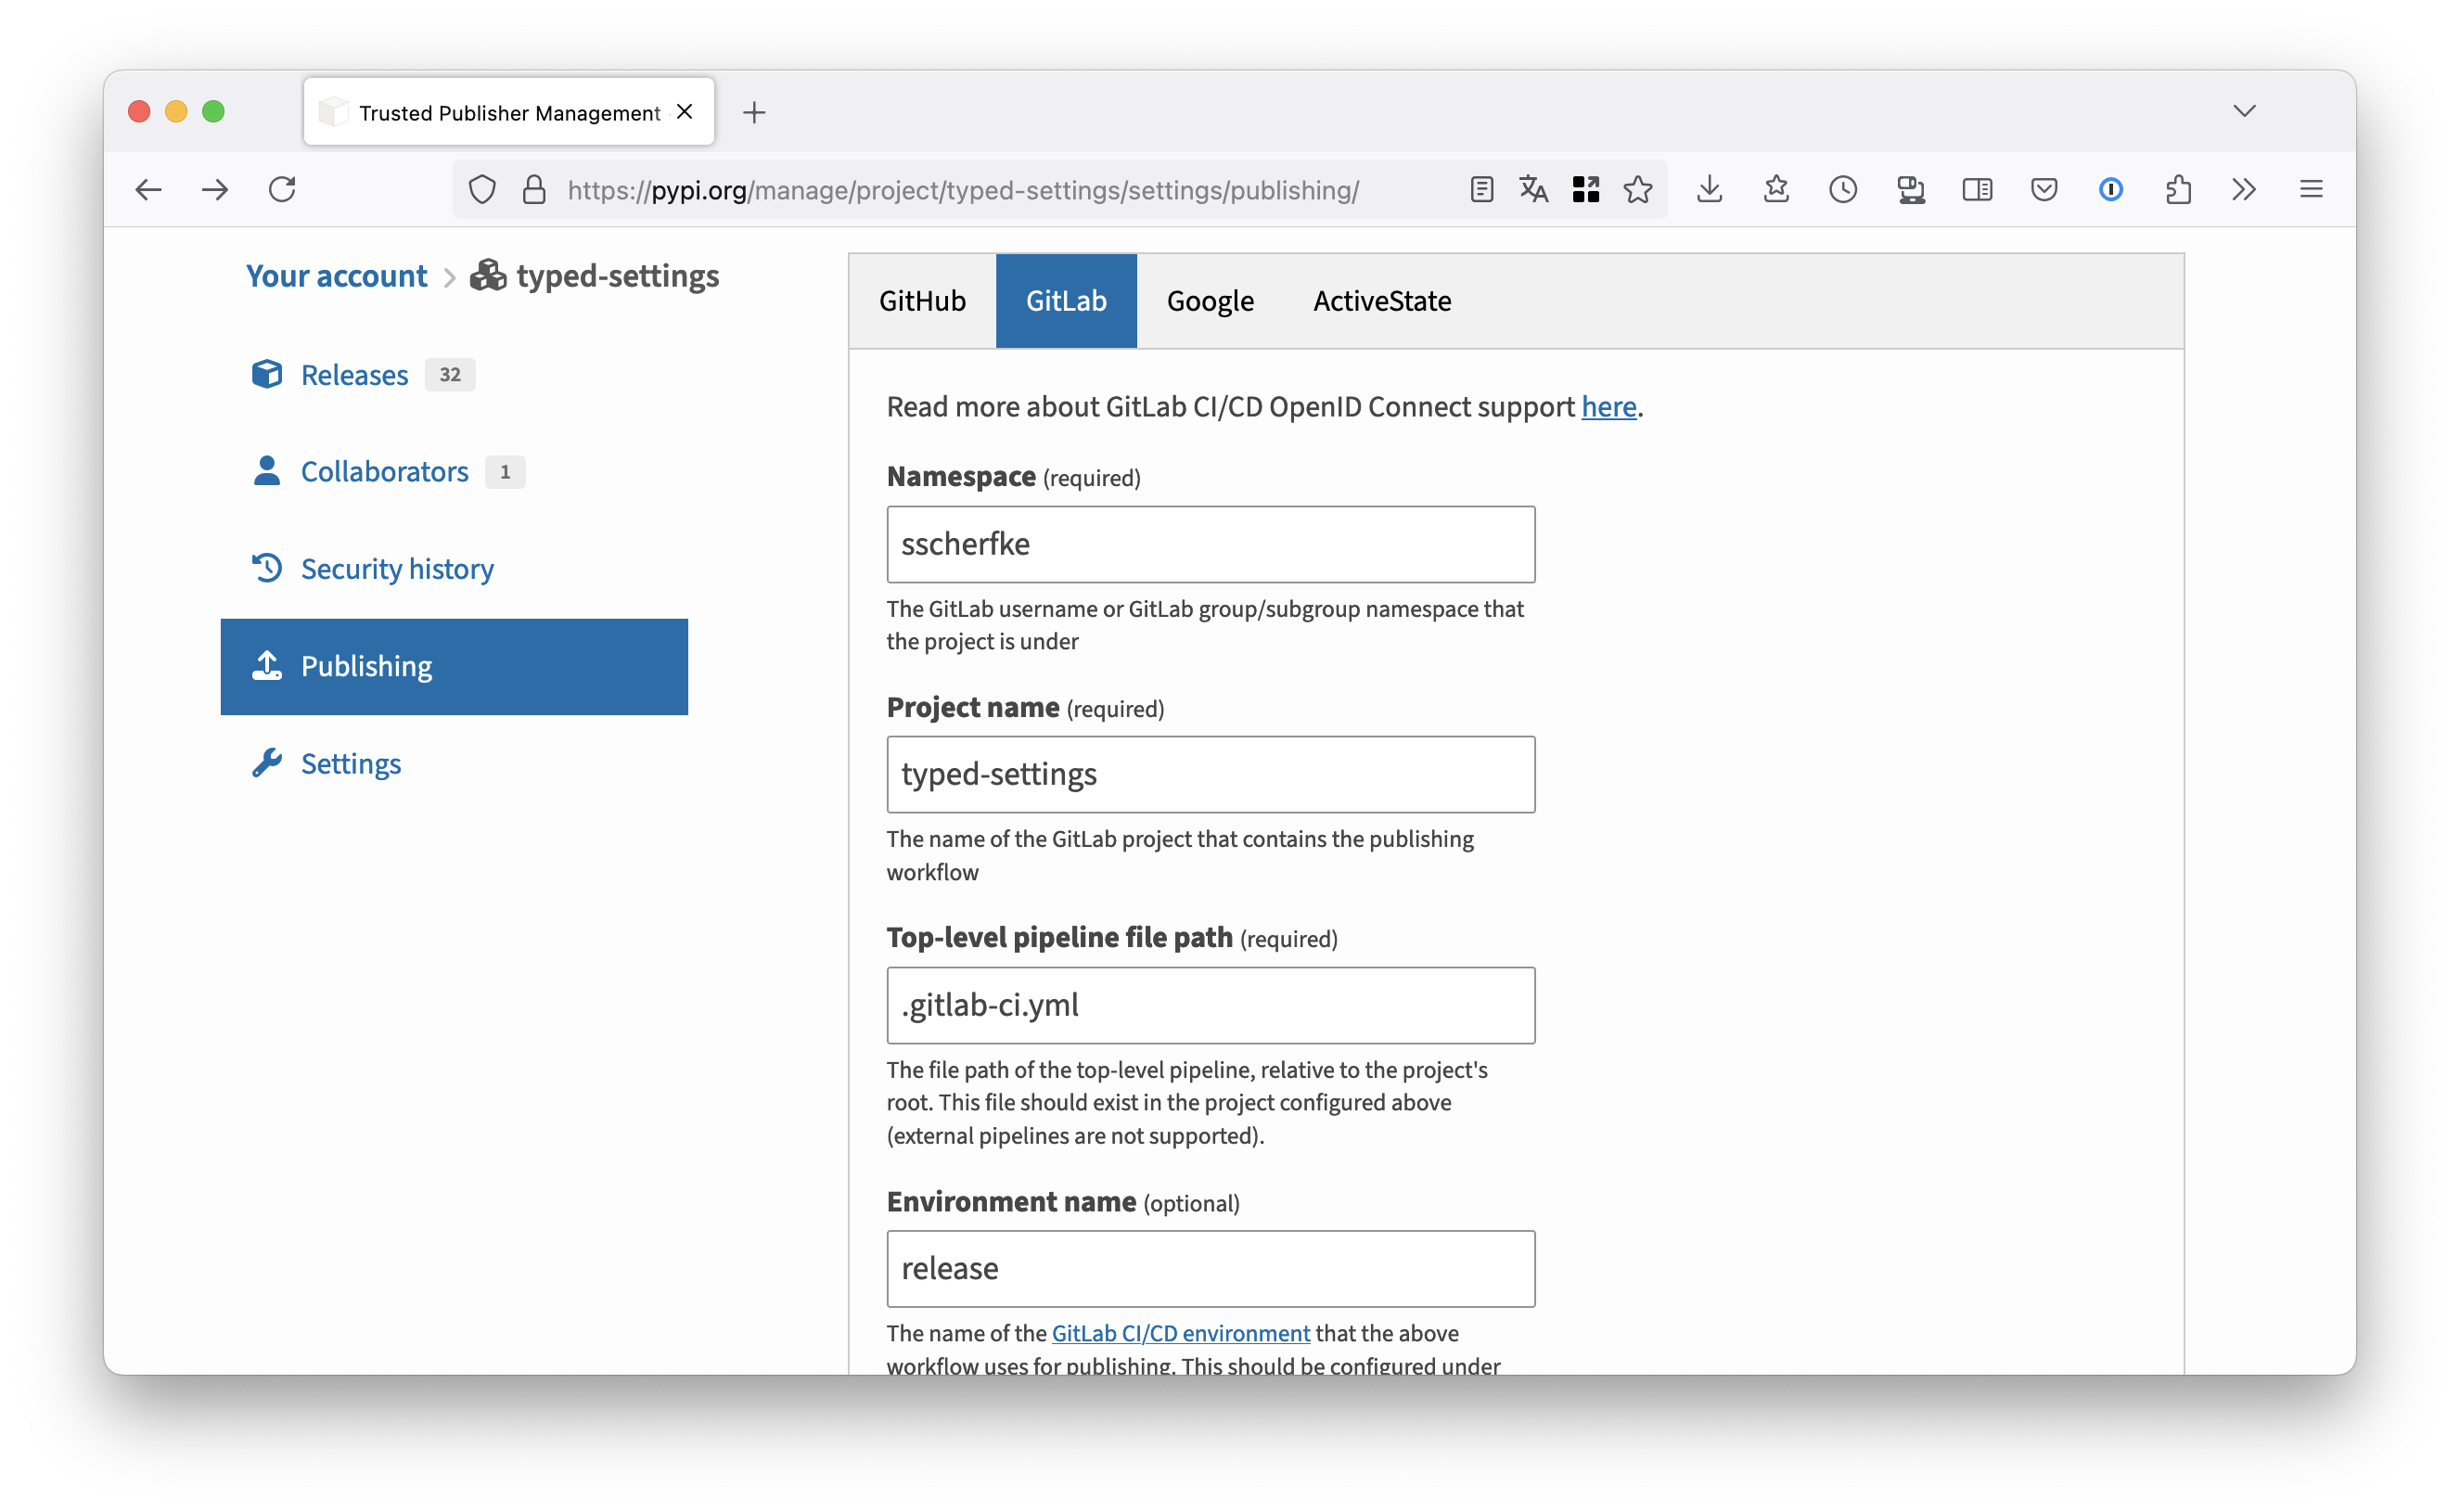
Add a new trusted publisher for GitLab as shown in the screenshot below.
Enter your project’s namespace (your GitLab username or the name of your organization), the project name, the filename of your CI def (usually
.gitlab-ci.yml).Use
releaseas the environment name!- Repeat the same steps for the TestPyPI,
but use
release-testas environment name.
GitLab CI/CD Settings
You need to create two environments and protect the one for production releases.
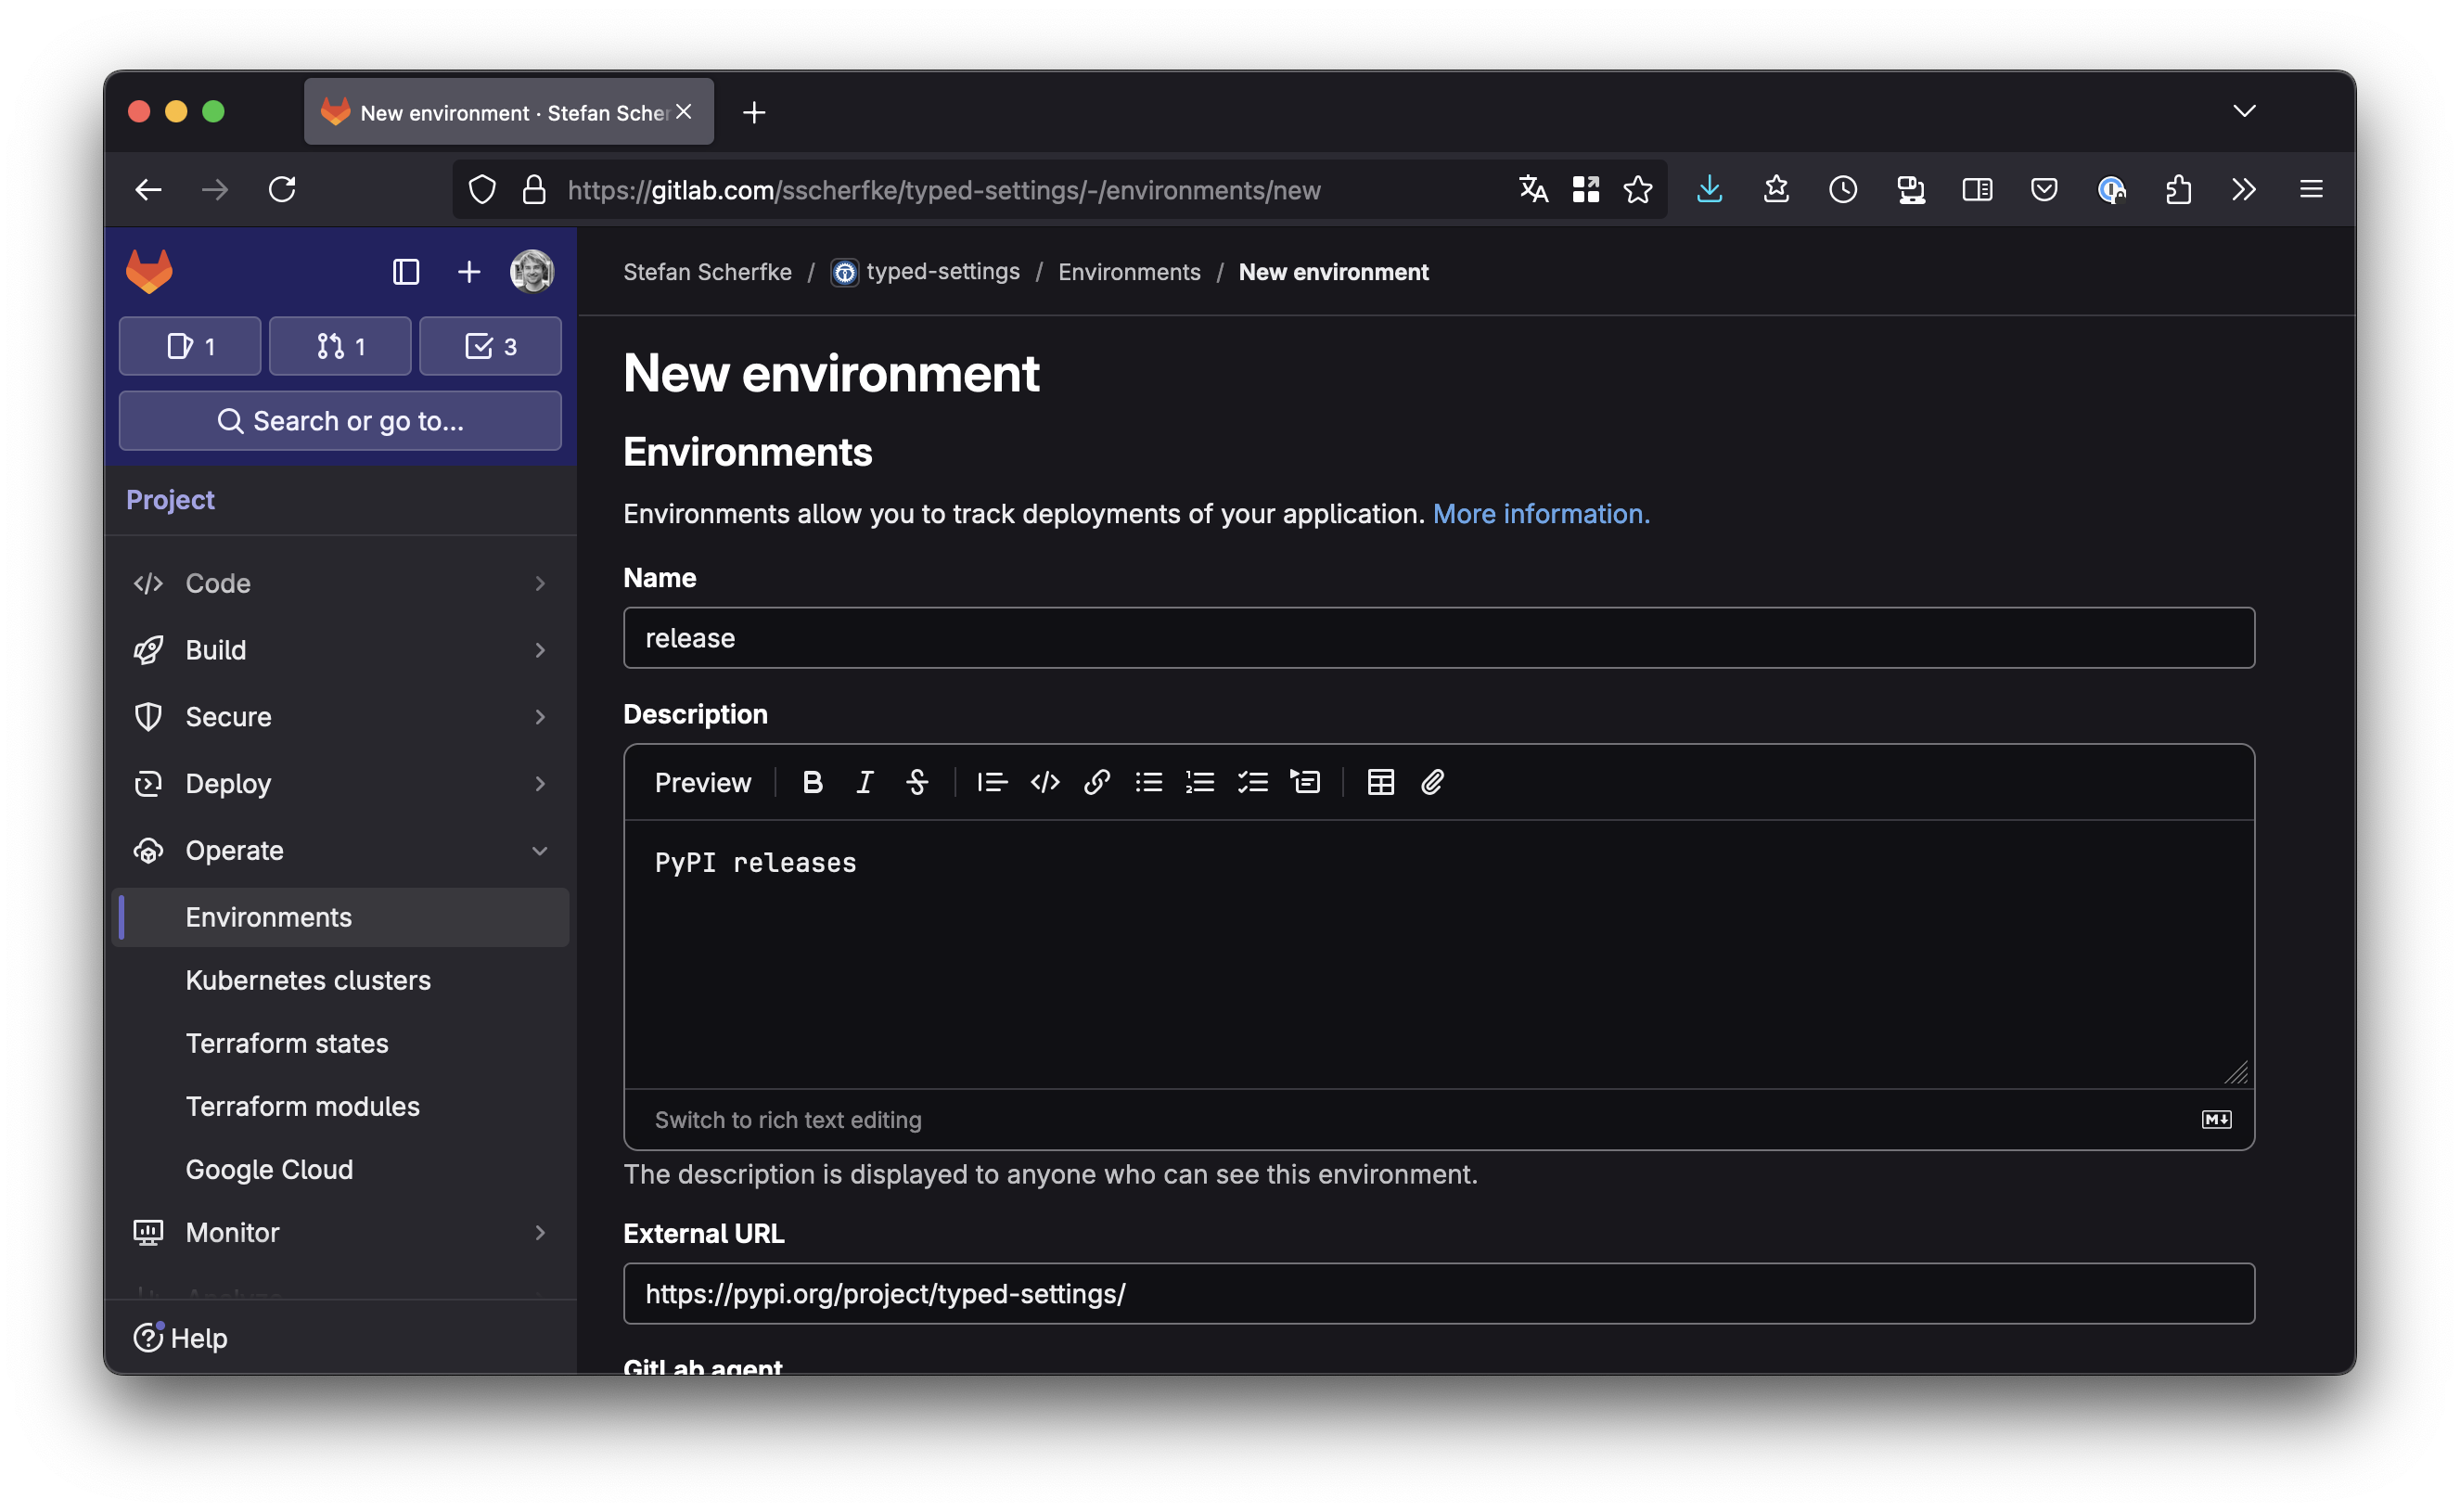
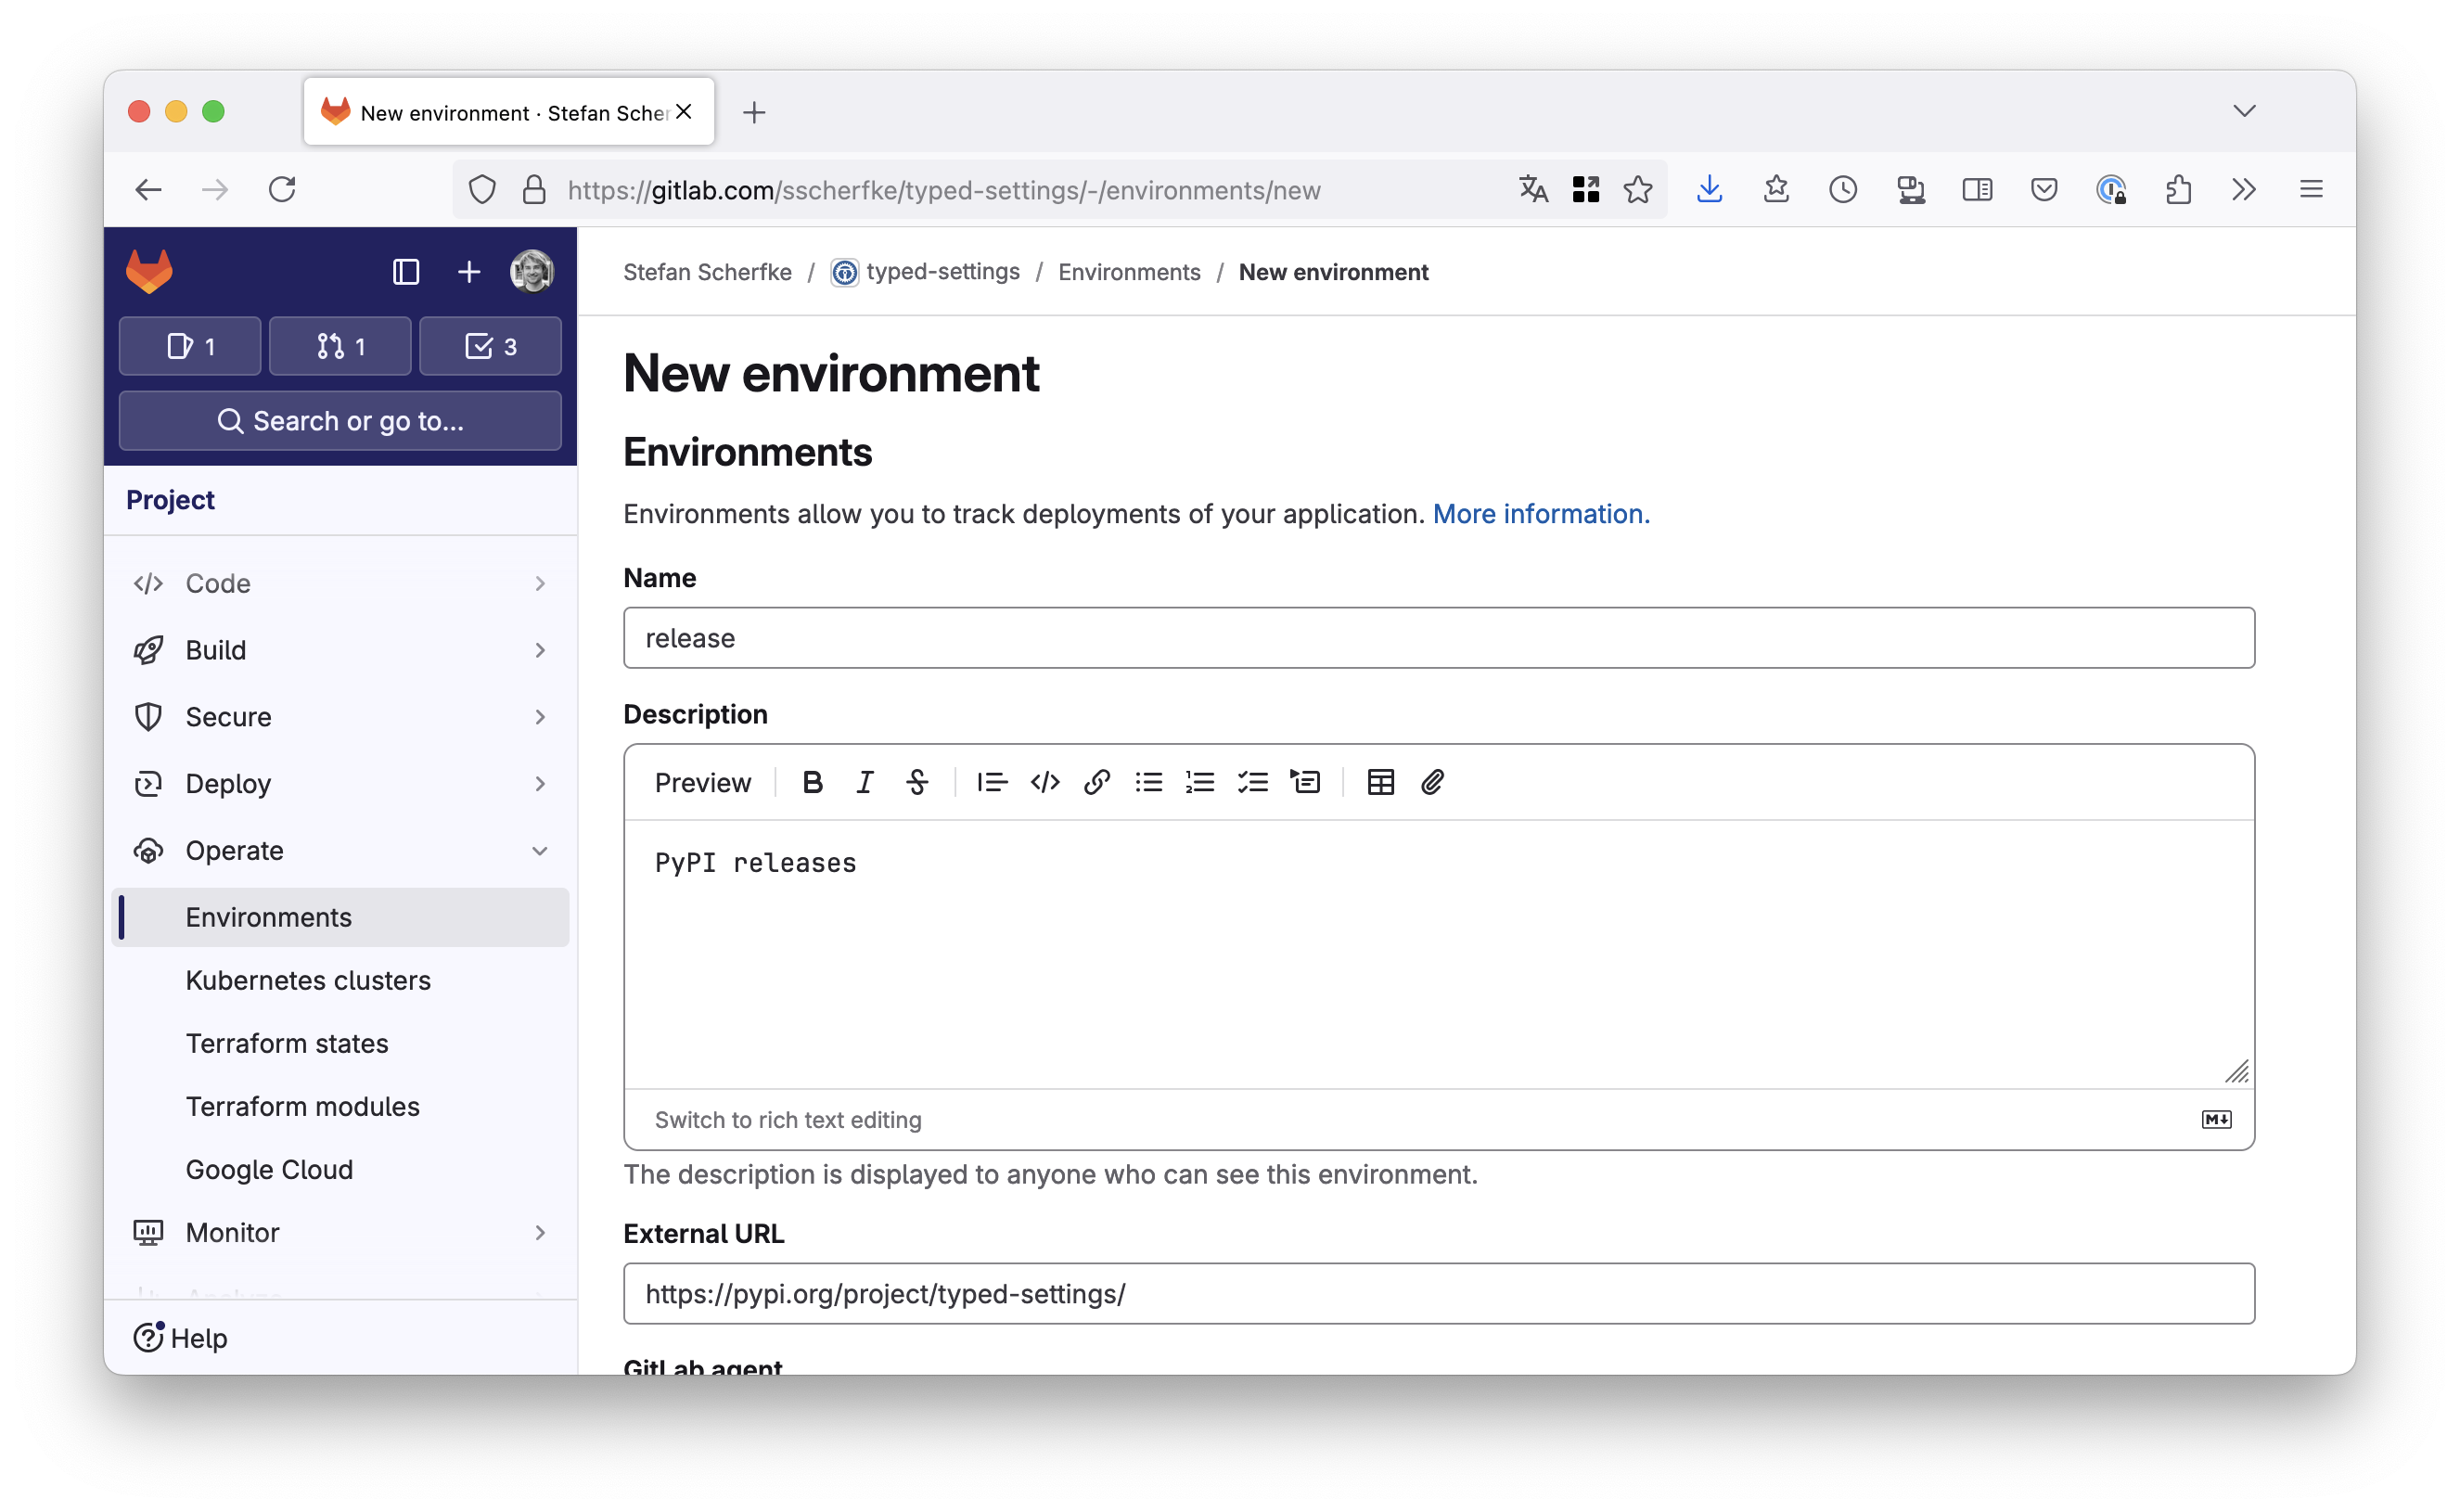
Open your project in GitLab, then go to Operate → Environments and click Create an environment to create the production environment:
- Title:
release - Description:
PyPI releases(or whatever you want) - External URL:
https://pypi.org/project/{your-project}/(the URL is displayed in a few places in GitLab and helps you to quickly navigate to your project on PyPI.)
Click Save.
- Title:
Click New environment (in the top right corner) to create the test environment:
- Title:
release-test - Description:
TestPyPI releases(or whatever you want) - External URL:
https://test.pypi.org/project/{your-project}/
Click Save.
- Title:
If protected environments are available (see the note above), navigate to Settings → CI/CD and open the Protected environments section. Click the Protect an environment button.
- Select environment:
release - Allowed to deploy: Choose a role or user, e.g.
Maintainers. - Approvers: Choose a role or user, e.g. yourself.
- Select environment:
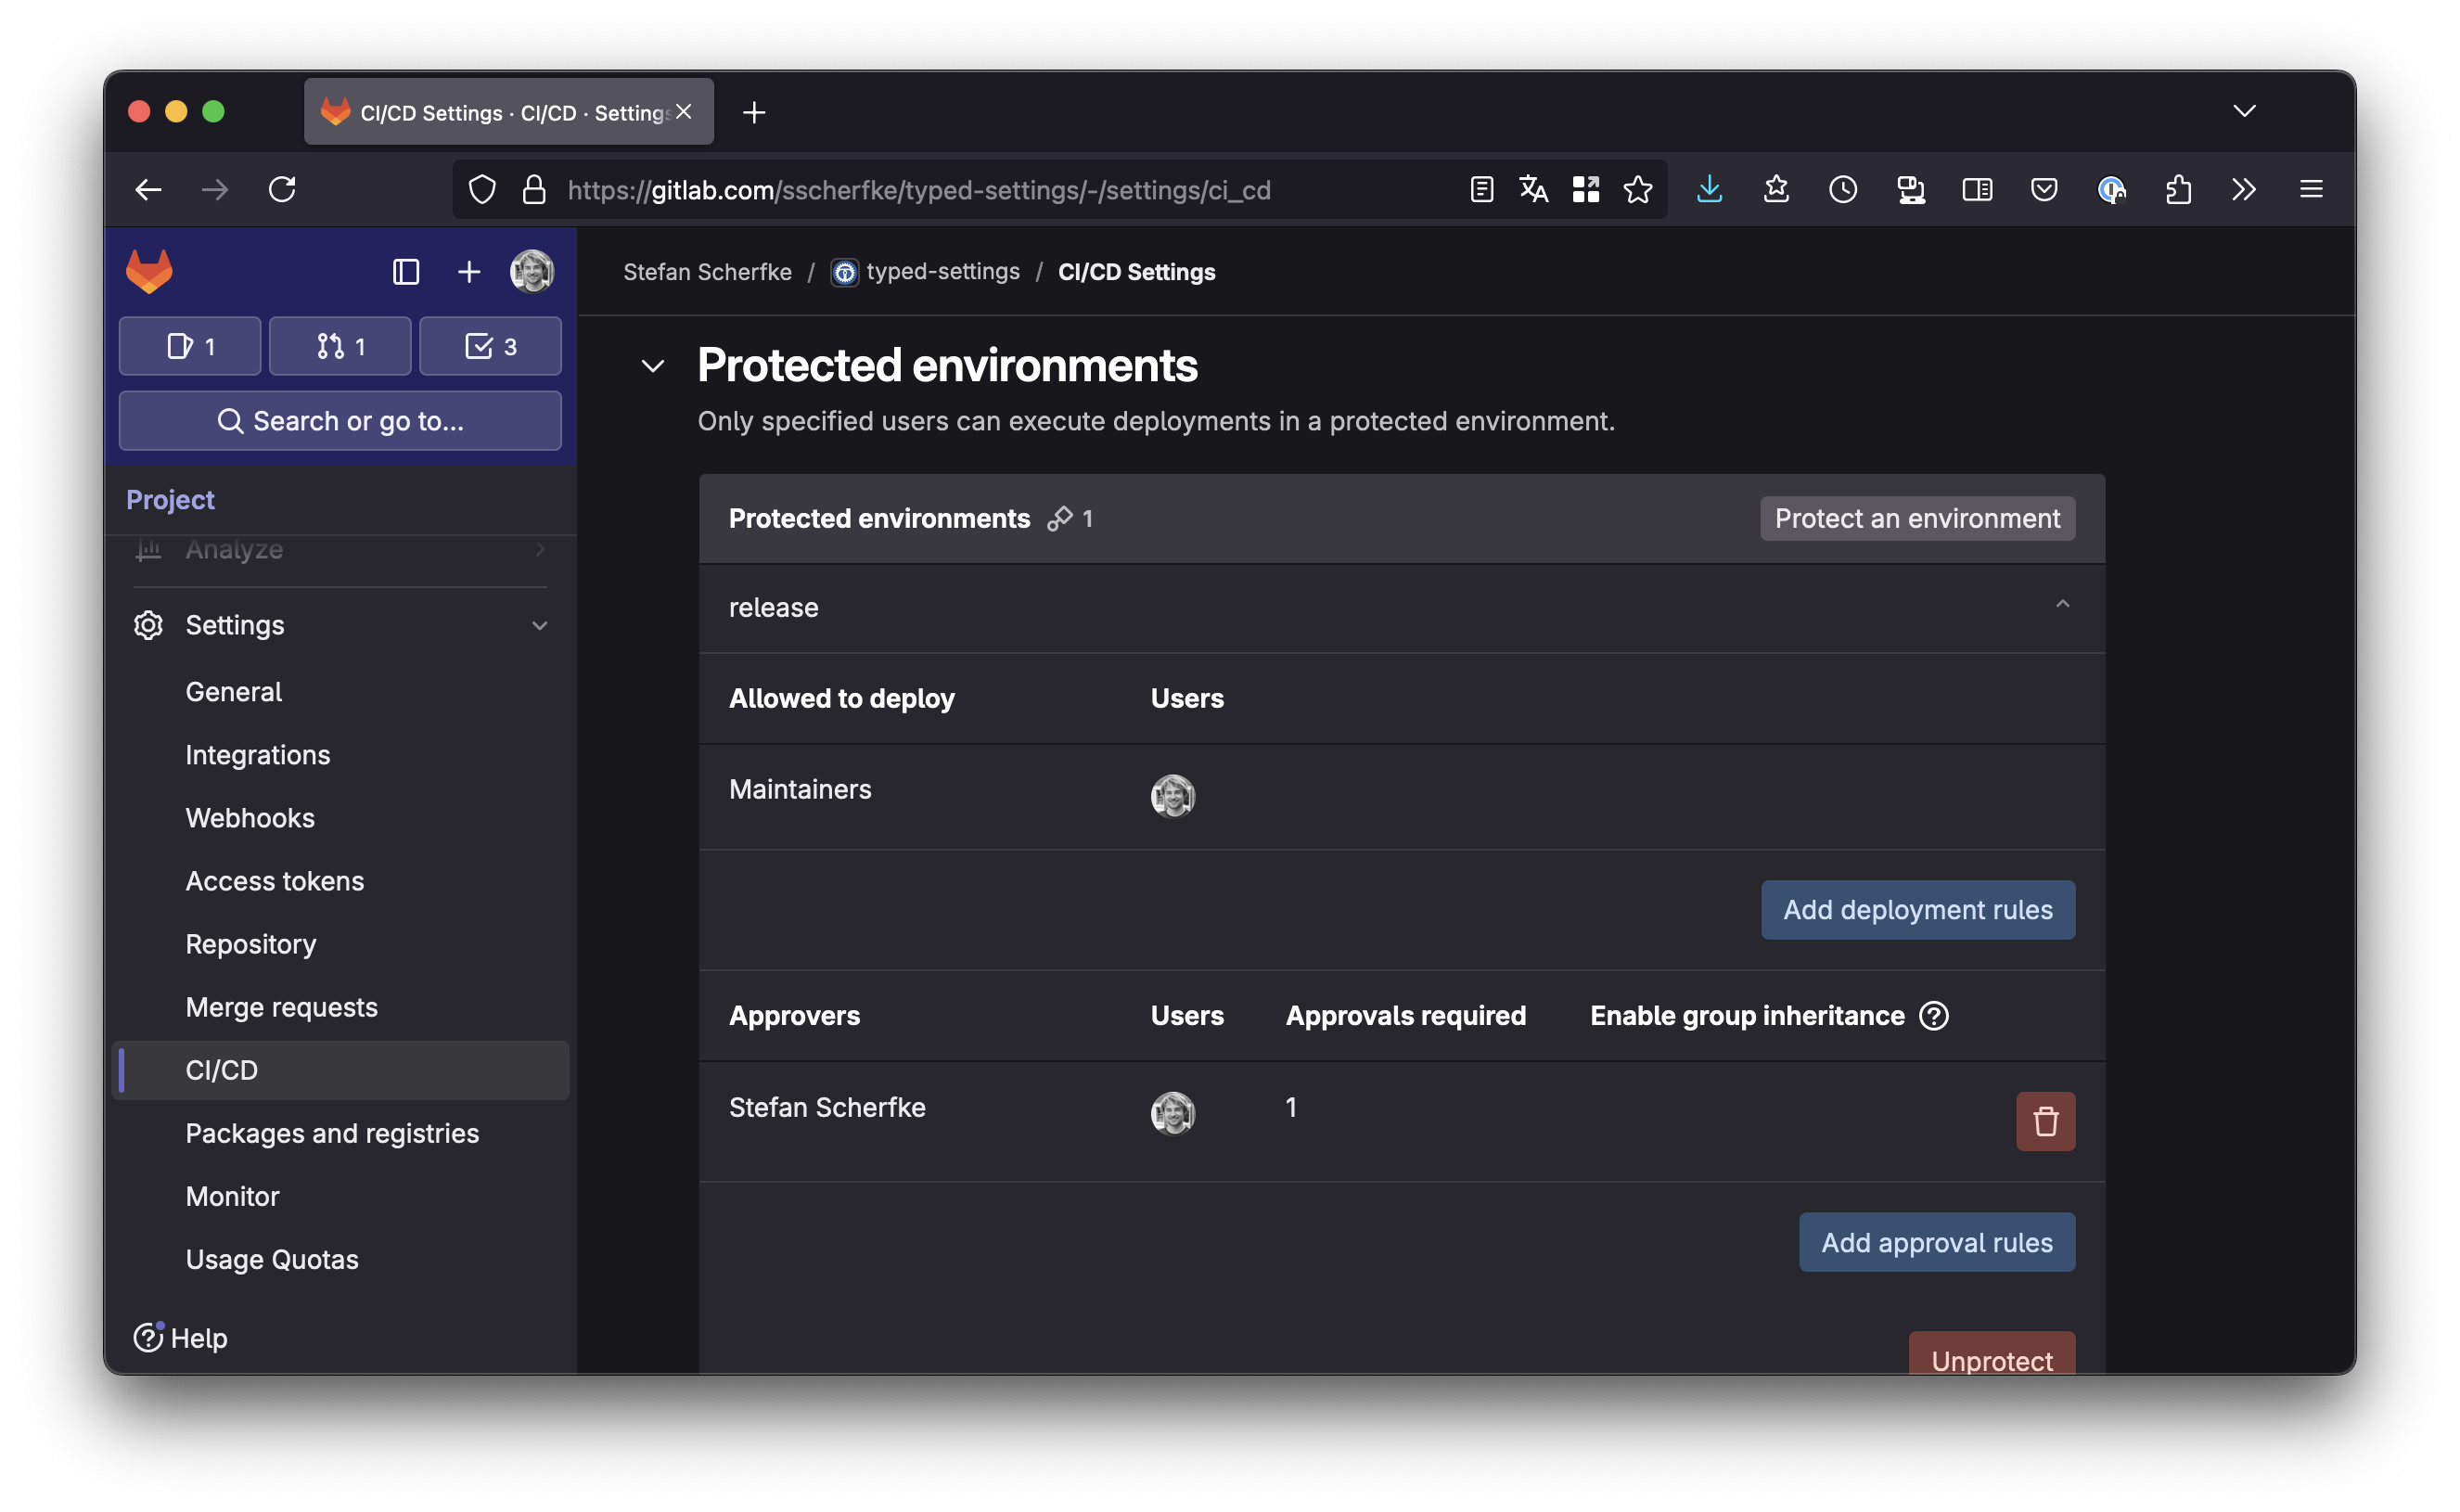
release environment (and thus, upload to PyPI).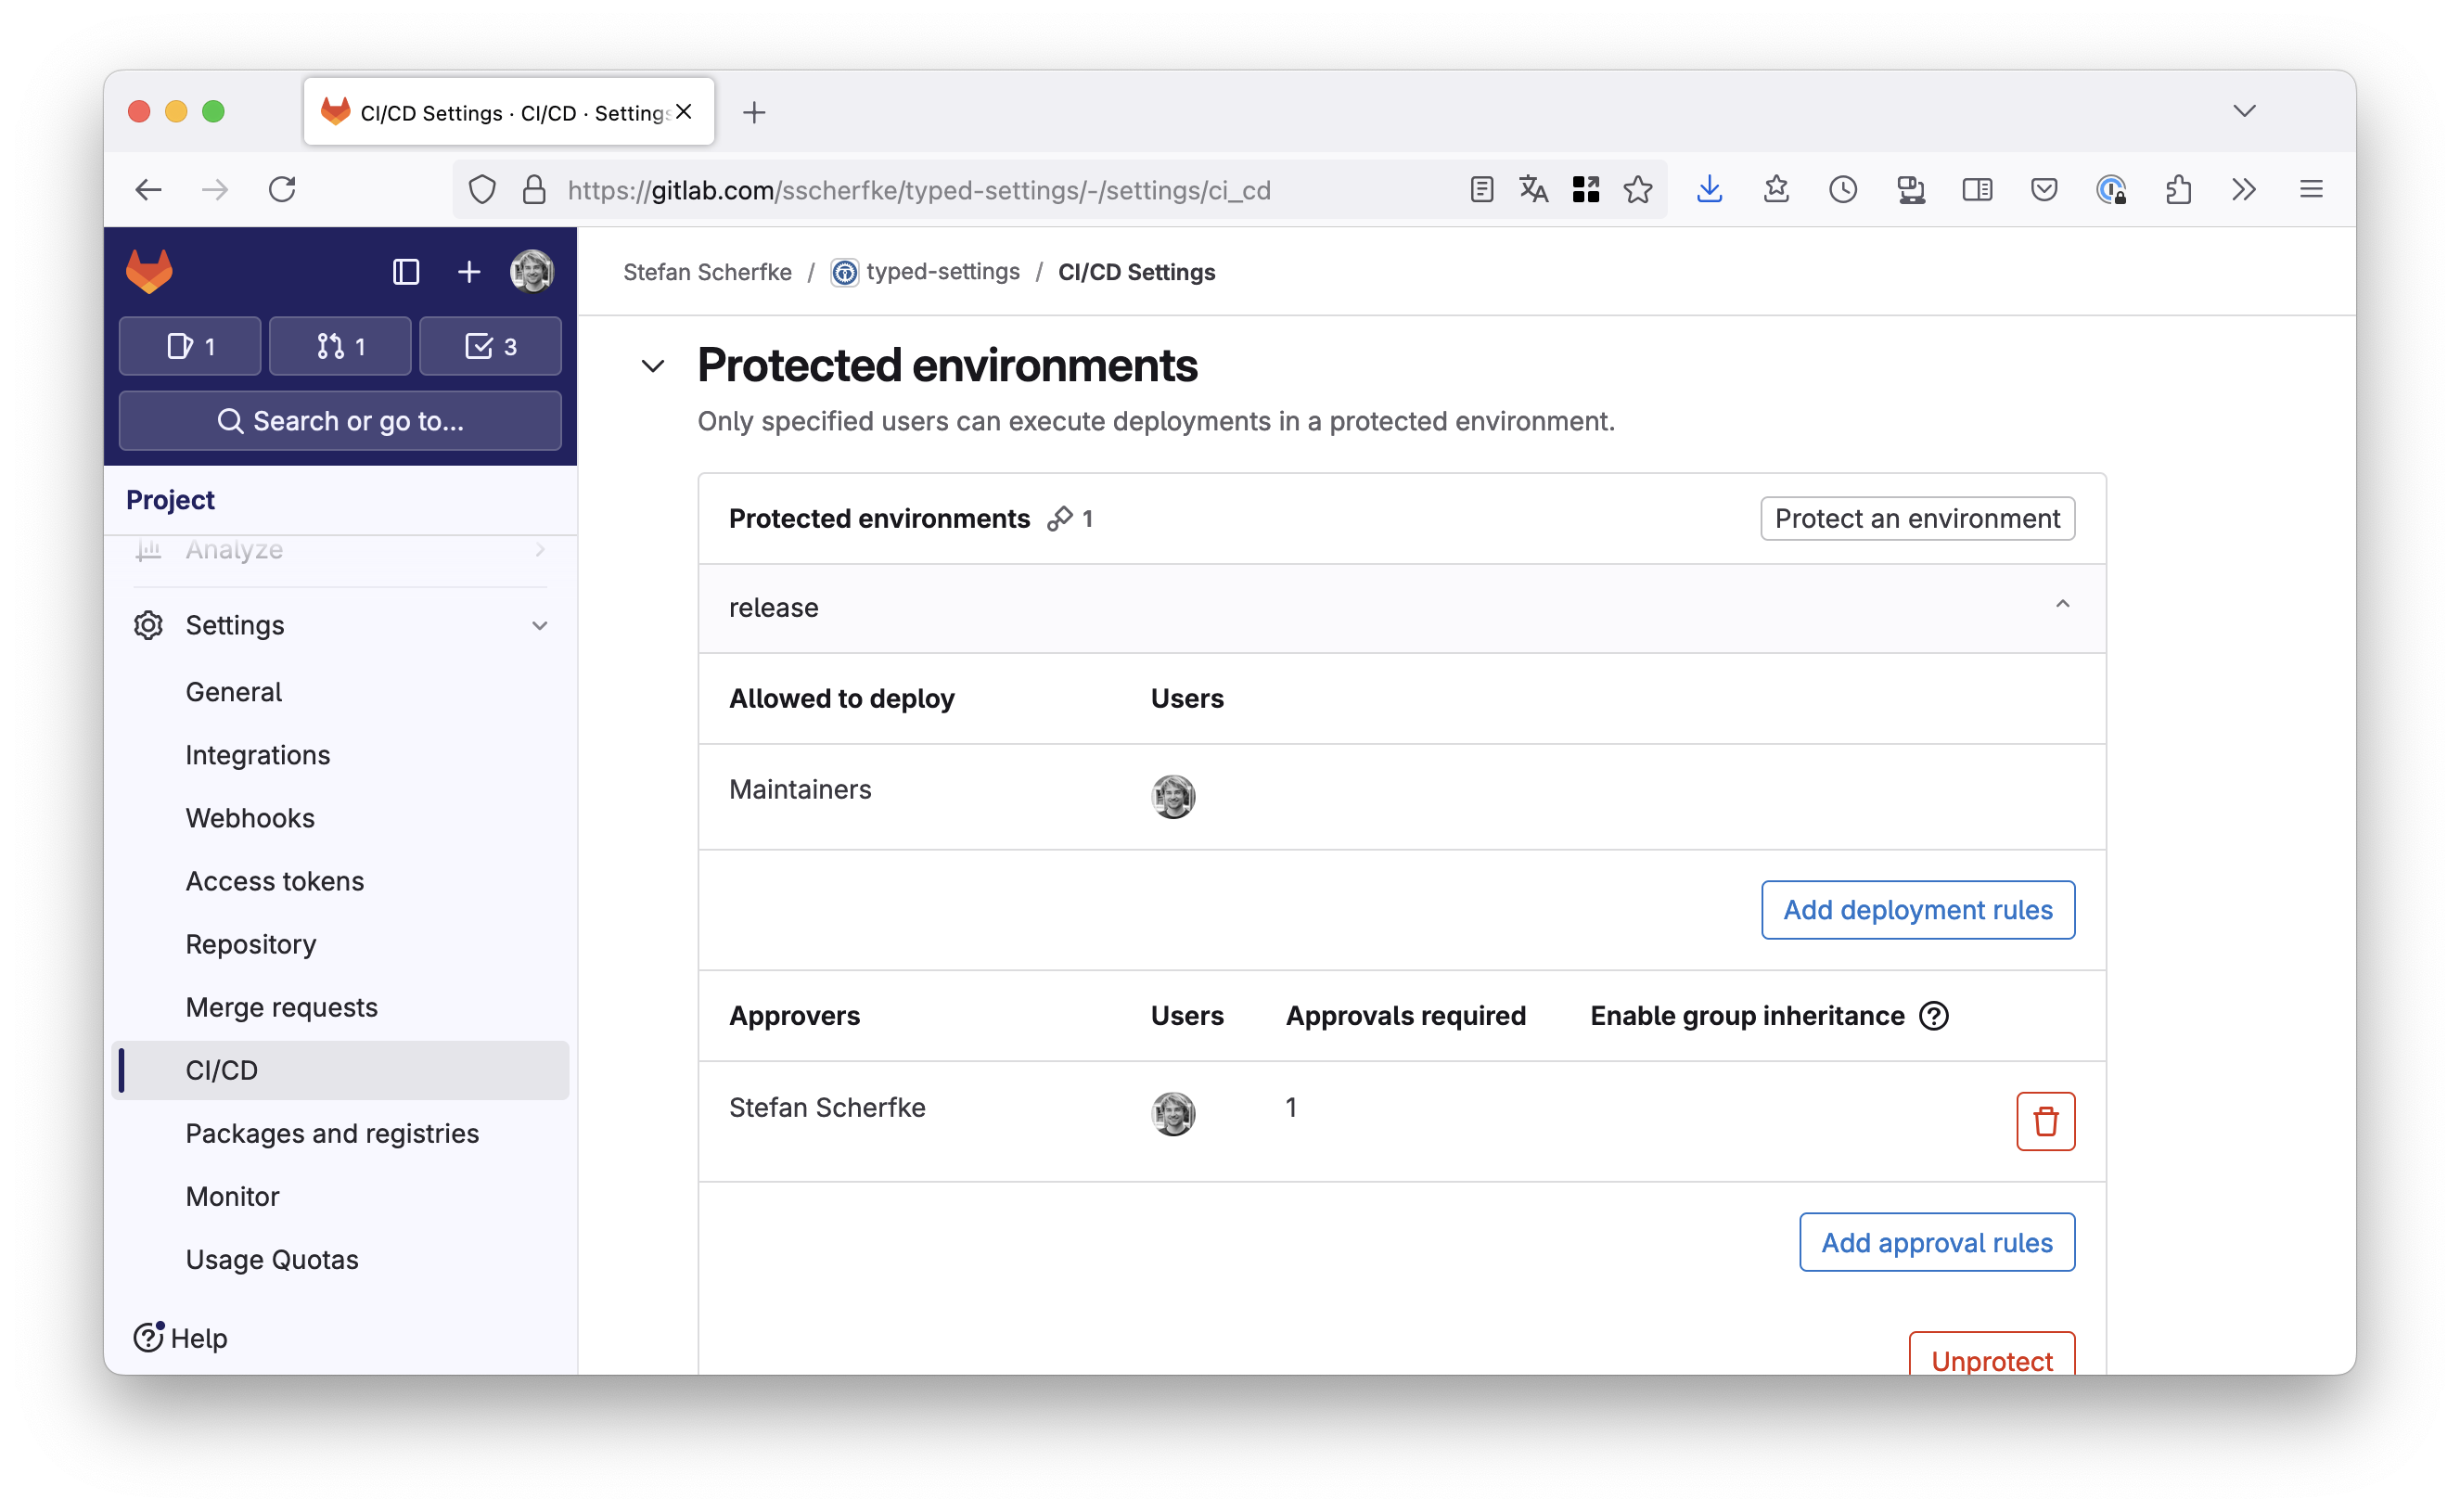
release environment (and thus, upload to PyPI).Changes in Project Files
In order to be able to upload each commit to the TestPyPI, we need a different version for each build. To achieve this, we can use hatch-vcs, setuptools_scm, or similar.
In the following example, we are going to use hatchling with hatch-vcs as the build backend and uv for everything else.
We configure the build backend in our
pyproject.tomlas follows:[build-system] requires = ["hatchling", "hatch-vcs"] build-backend = "hatchling.build" [tool.hatch.version] source = "vcs" raw-options = { local_scheme = "no-local-version" } # TestPyPI lacks support for this [project] dynamic = ["version"]
Now lets open our project’s
.gitlab-ci.ymlwhich we’ll edit during the next steps.We need at least a
buildand adeploystage:stages: - 'build' # - 'test' # - ... - 'deploy'
Python build tools usually put their artifacts (binary wheels and source distributions) into
dist/. This directory needs to be added to your pipeline artifacts, so that these files are available in later pipeline jobs:build: stage: 'build' script: - 'uv build --out-dir=dist' artifacts: paths: - 'dist/'
For our use-case, we need two release jobs: One that uploads to the TestPyPI on each push (
release-test) and one that uploads to the PyPI in tag pipelines (release).Since both jobs are nearly the same, we’ll also define an “abstract base job”
.release-basewhich the other two extend..release-base: # Abstract base job for "release" jobs. # Extending jobs must define the following variables: # - PYPI_OIDC_AUD: Audience for the ID token that GitLab # issues to the pipeline job # - PYPI_OIDC_URL: PyPI endpoint for retrieving a publish # token with GitLab’s ID token # - UV_PUBLISH_URL: PyPI endpoint for the actual upload stage: 'deploy' id_tokens: PYPI_ID_TOKEN: aud: '$PYPI_OIDC_AUD' script: # Use the GitLab ID token to retrieve an API token from PyPI - >- resp="$(curl -X POST "${PYPI_OIDC_URL}" -d "{\"token\":\"${PYPI_ID_TOKEN}\"}")" # Parse the response and extract the token - >- publish_token="$(python -c "import json; print(json.load('${resp}')['token'])")" # Upload the files from "dist/" - 'uv publish --token "$publish_token"' # Print the link to PyPI so we can quickly go there to verify the result: - 'version="$(uv run --with hatch-vcs hatchling version)"' - 'echo -e "\033[34;1mPackage on PyPI:\033[0m ${CI_ENVIRONMENT_URL}${version}/"'
Now we can add the
release-testjob. It extends.release-base, defines variables for the base job, and rules for when the job should run:release-test: extends: '.release-base' rules: # Only run if it's a pipeline for the default branch or a tag: - if: '$CI_COMMIT_BRANCH == $CI_DEFAULT_BRANCH || $CI_COMMIT_TAG' environment: name: 'release-test' url: 'https://test.pypi.org/project/typed-settings/' variables: PYPI_OIDC_AUD: 'testpypi' PYPI_OIDC_URL: 'https://test.pypi.org/_/oidc/mint-token' UV_PUBLISH_URL: 'https://test.pypi.org/legacy/'
The
releasejob looks very similar, but the variables have different values and the job only runs in tag pipelines.release: extends: '.release-base' rules: # Only run in tag pipelines: - if: '$CI_COMMIT_TAG' environment: name: 'release' url: 'https://pypi.org/project/typed-settings/' variables: PYPI_OIDC_AUD: 'pypi' PYPI_OIDC_URL: 'https://pypi.org/_/oidc/mint-token' UV_PUBLISH_URL: 'https://upload.pypi.org/legacy/'
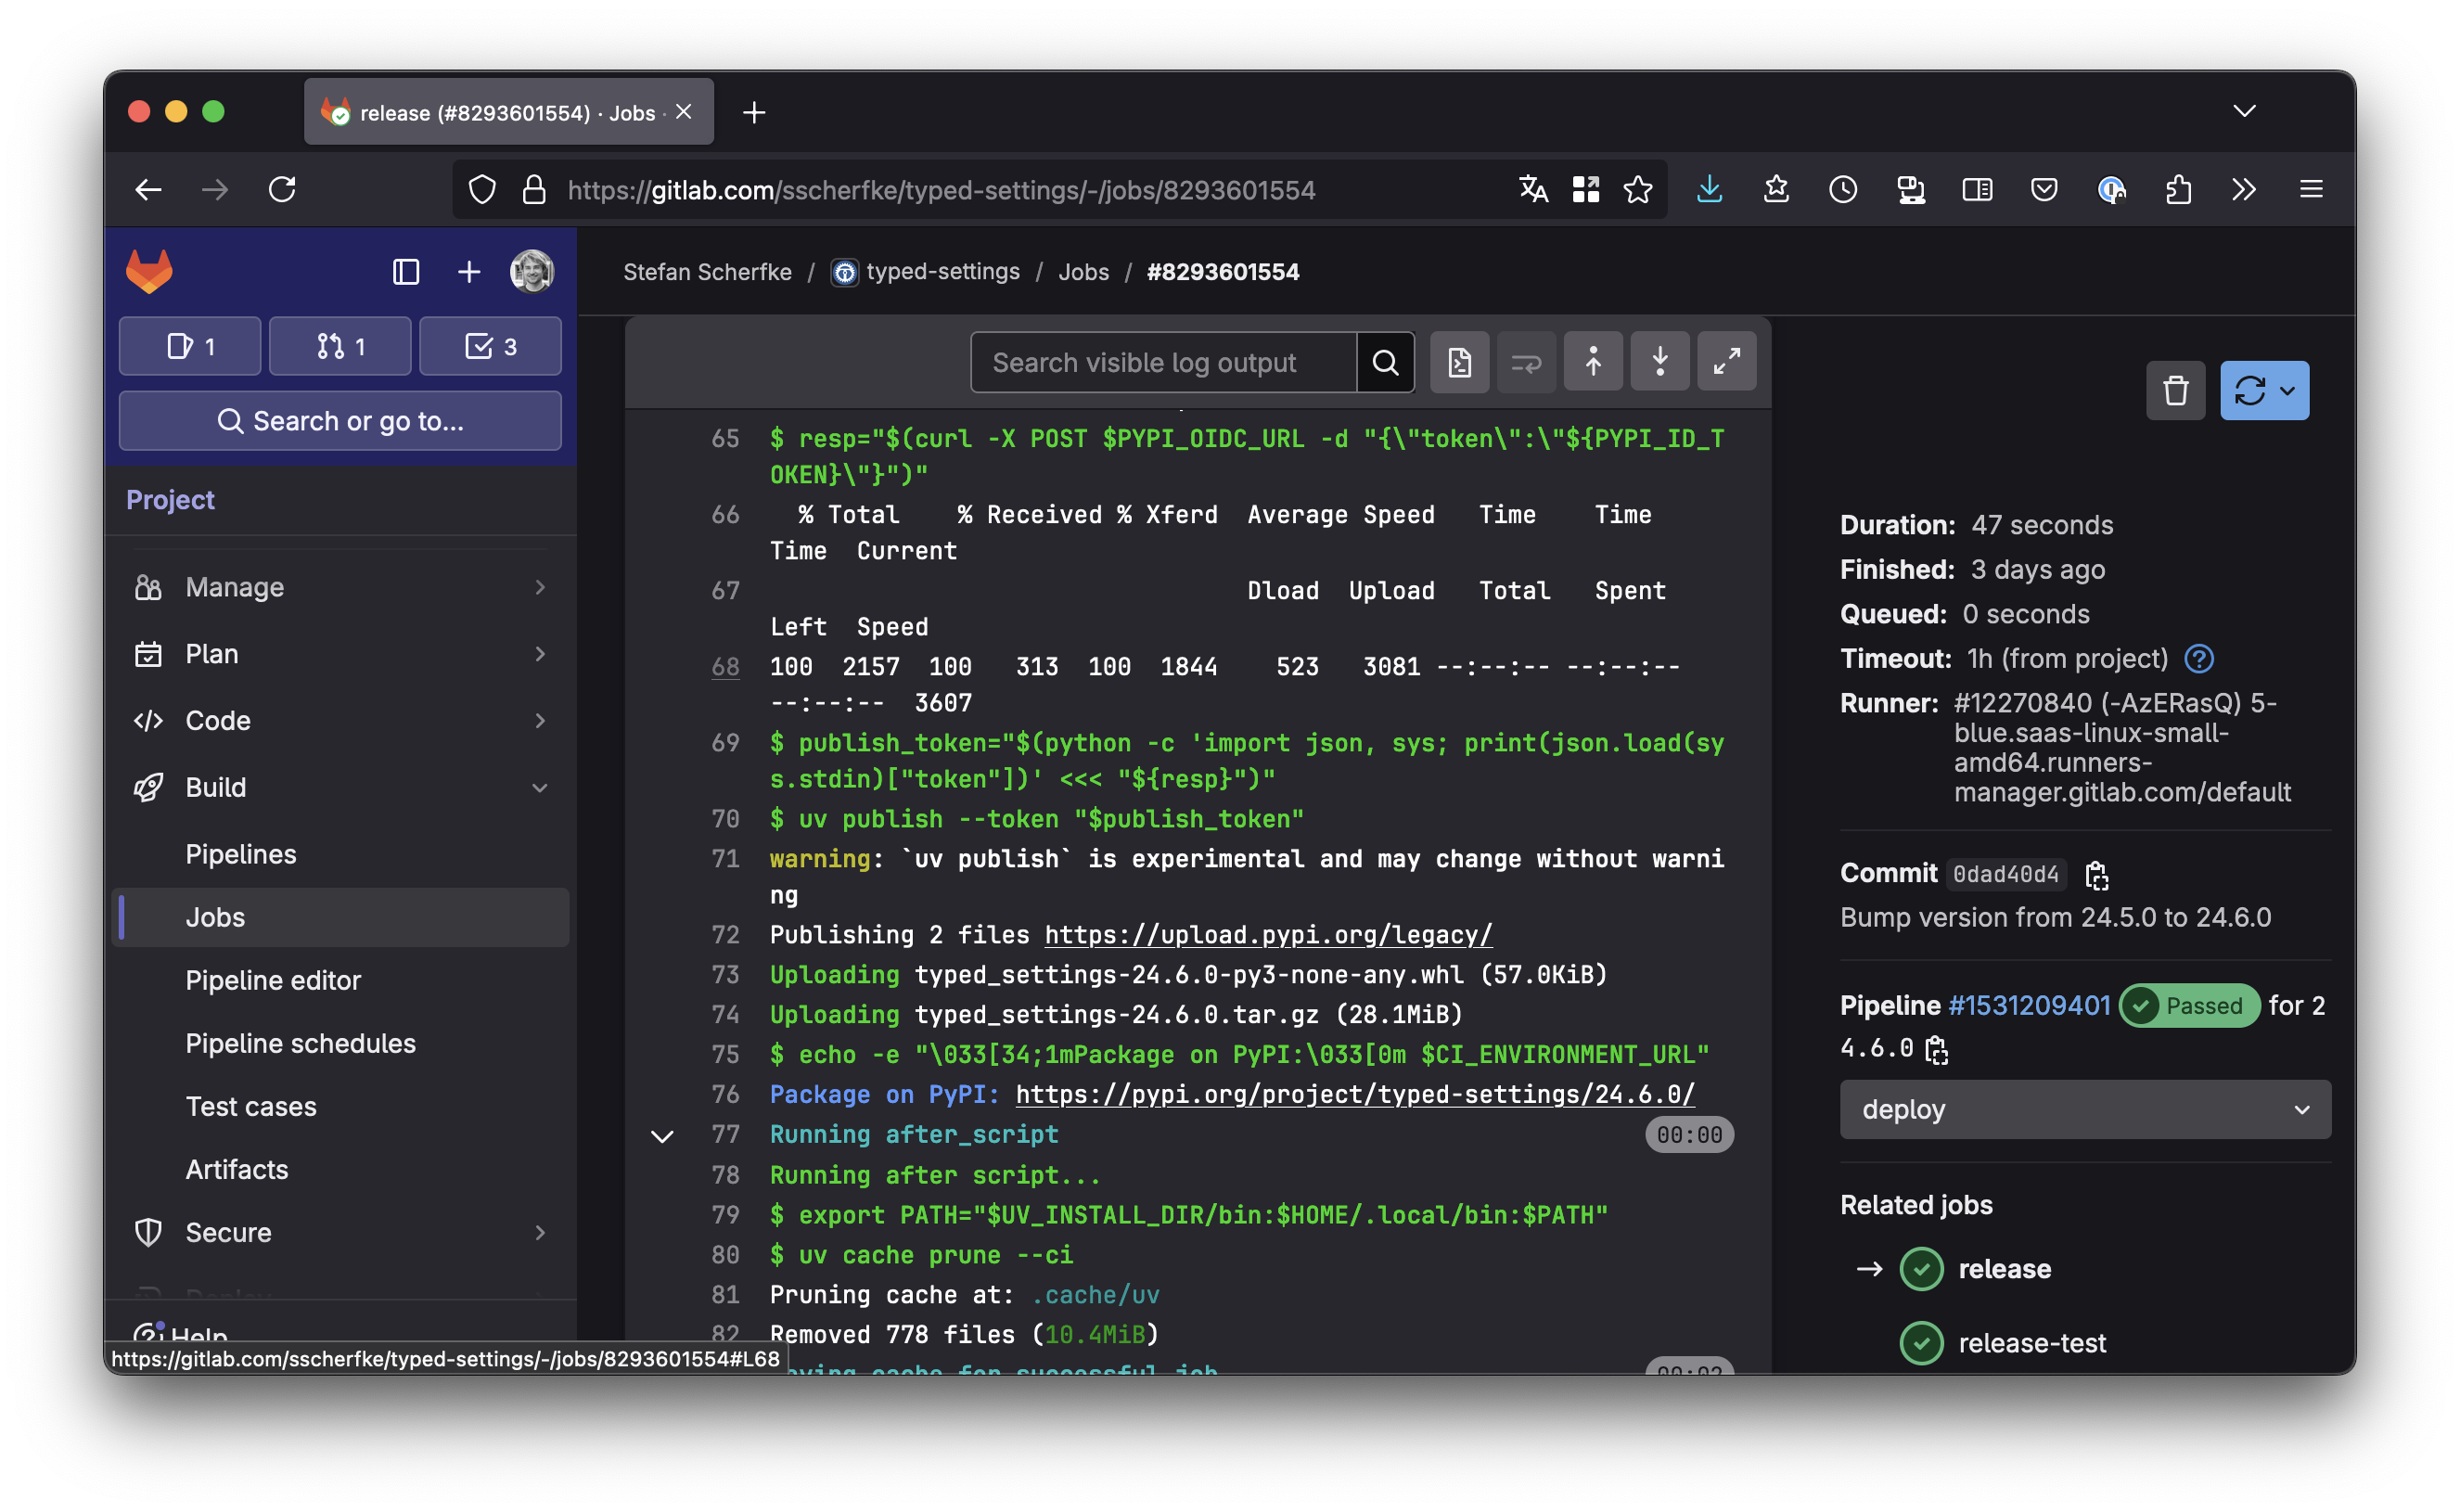
release will look like this.
There’s also a link that takes you directly to the release on PyPI.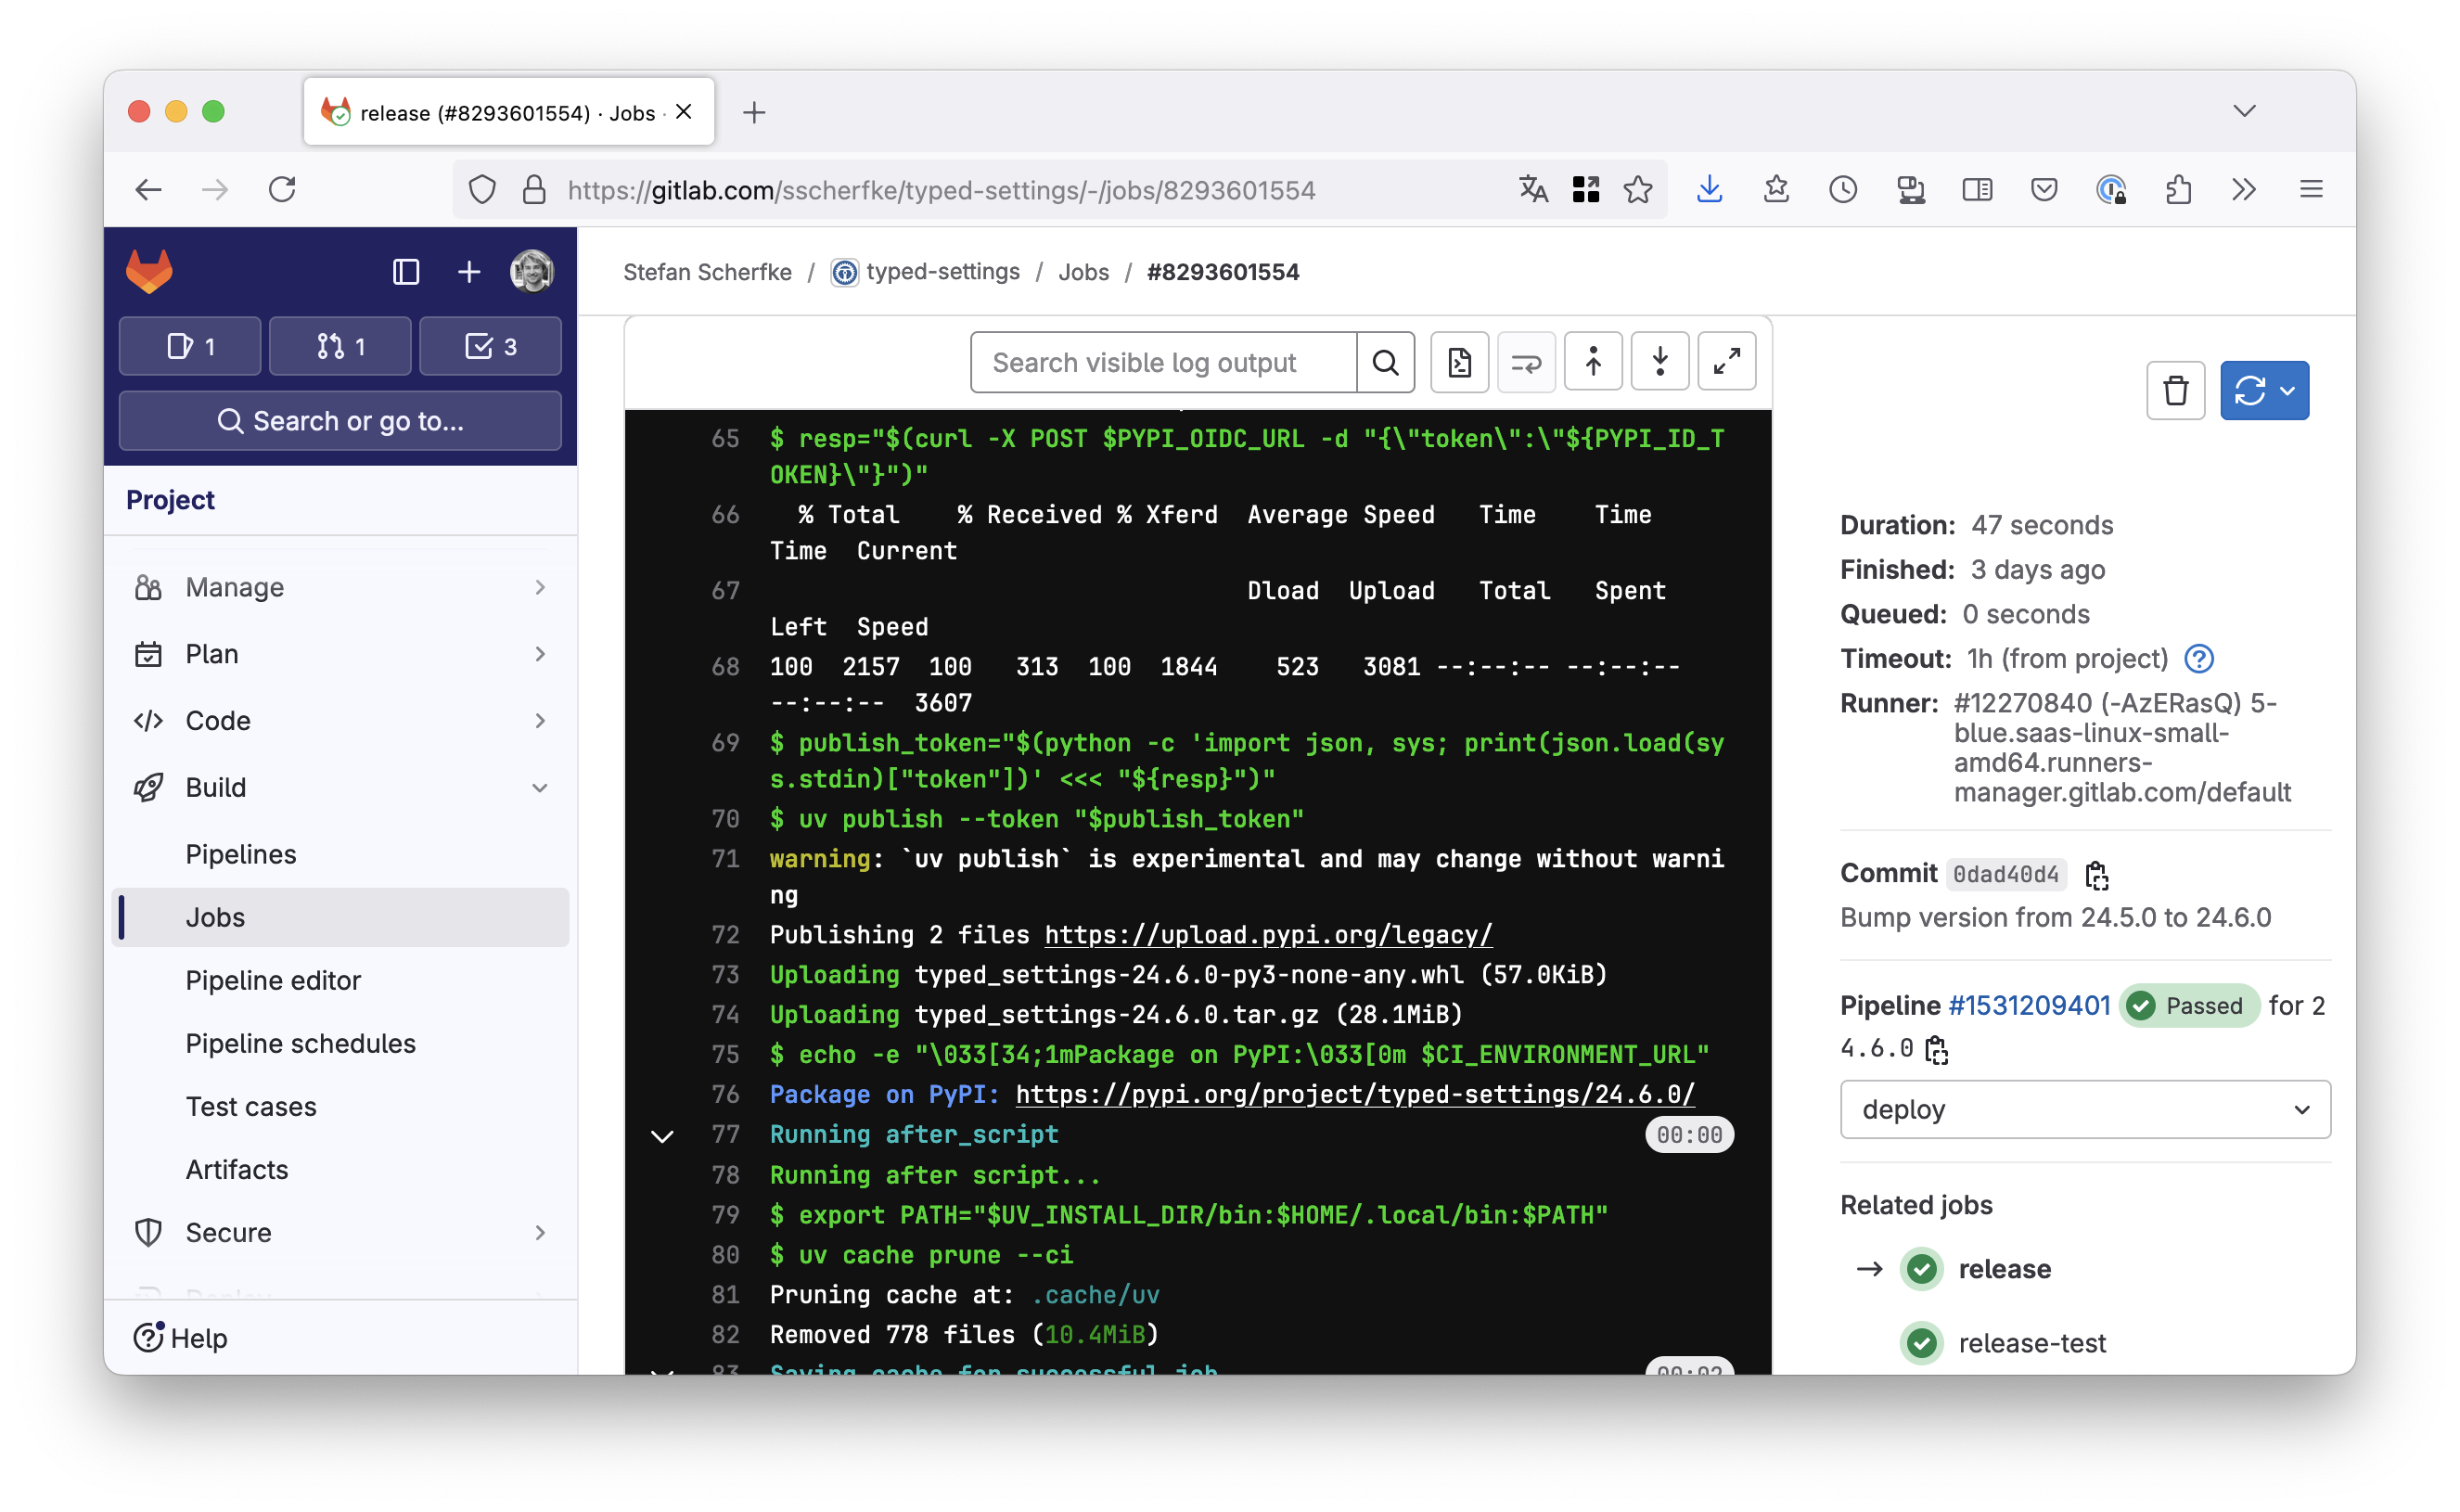
release will look like this.
There’s also a link that takes you directly to the release on PyPI.That’s it. You should now be able to automatically create PyPI releases directly from your GitLab CI/CD pipeline. 🎉
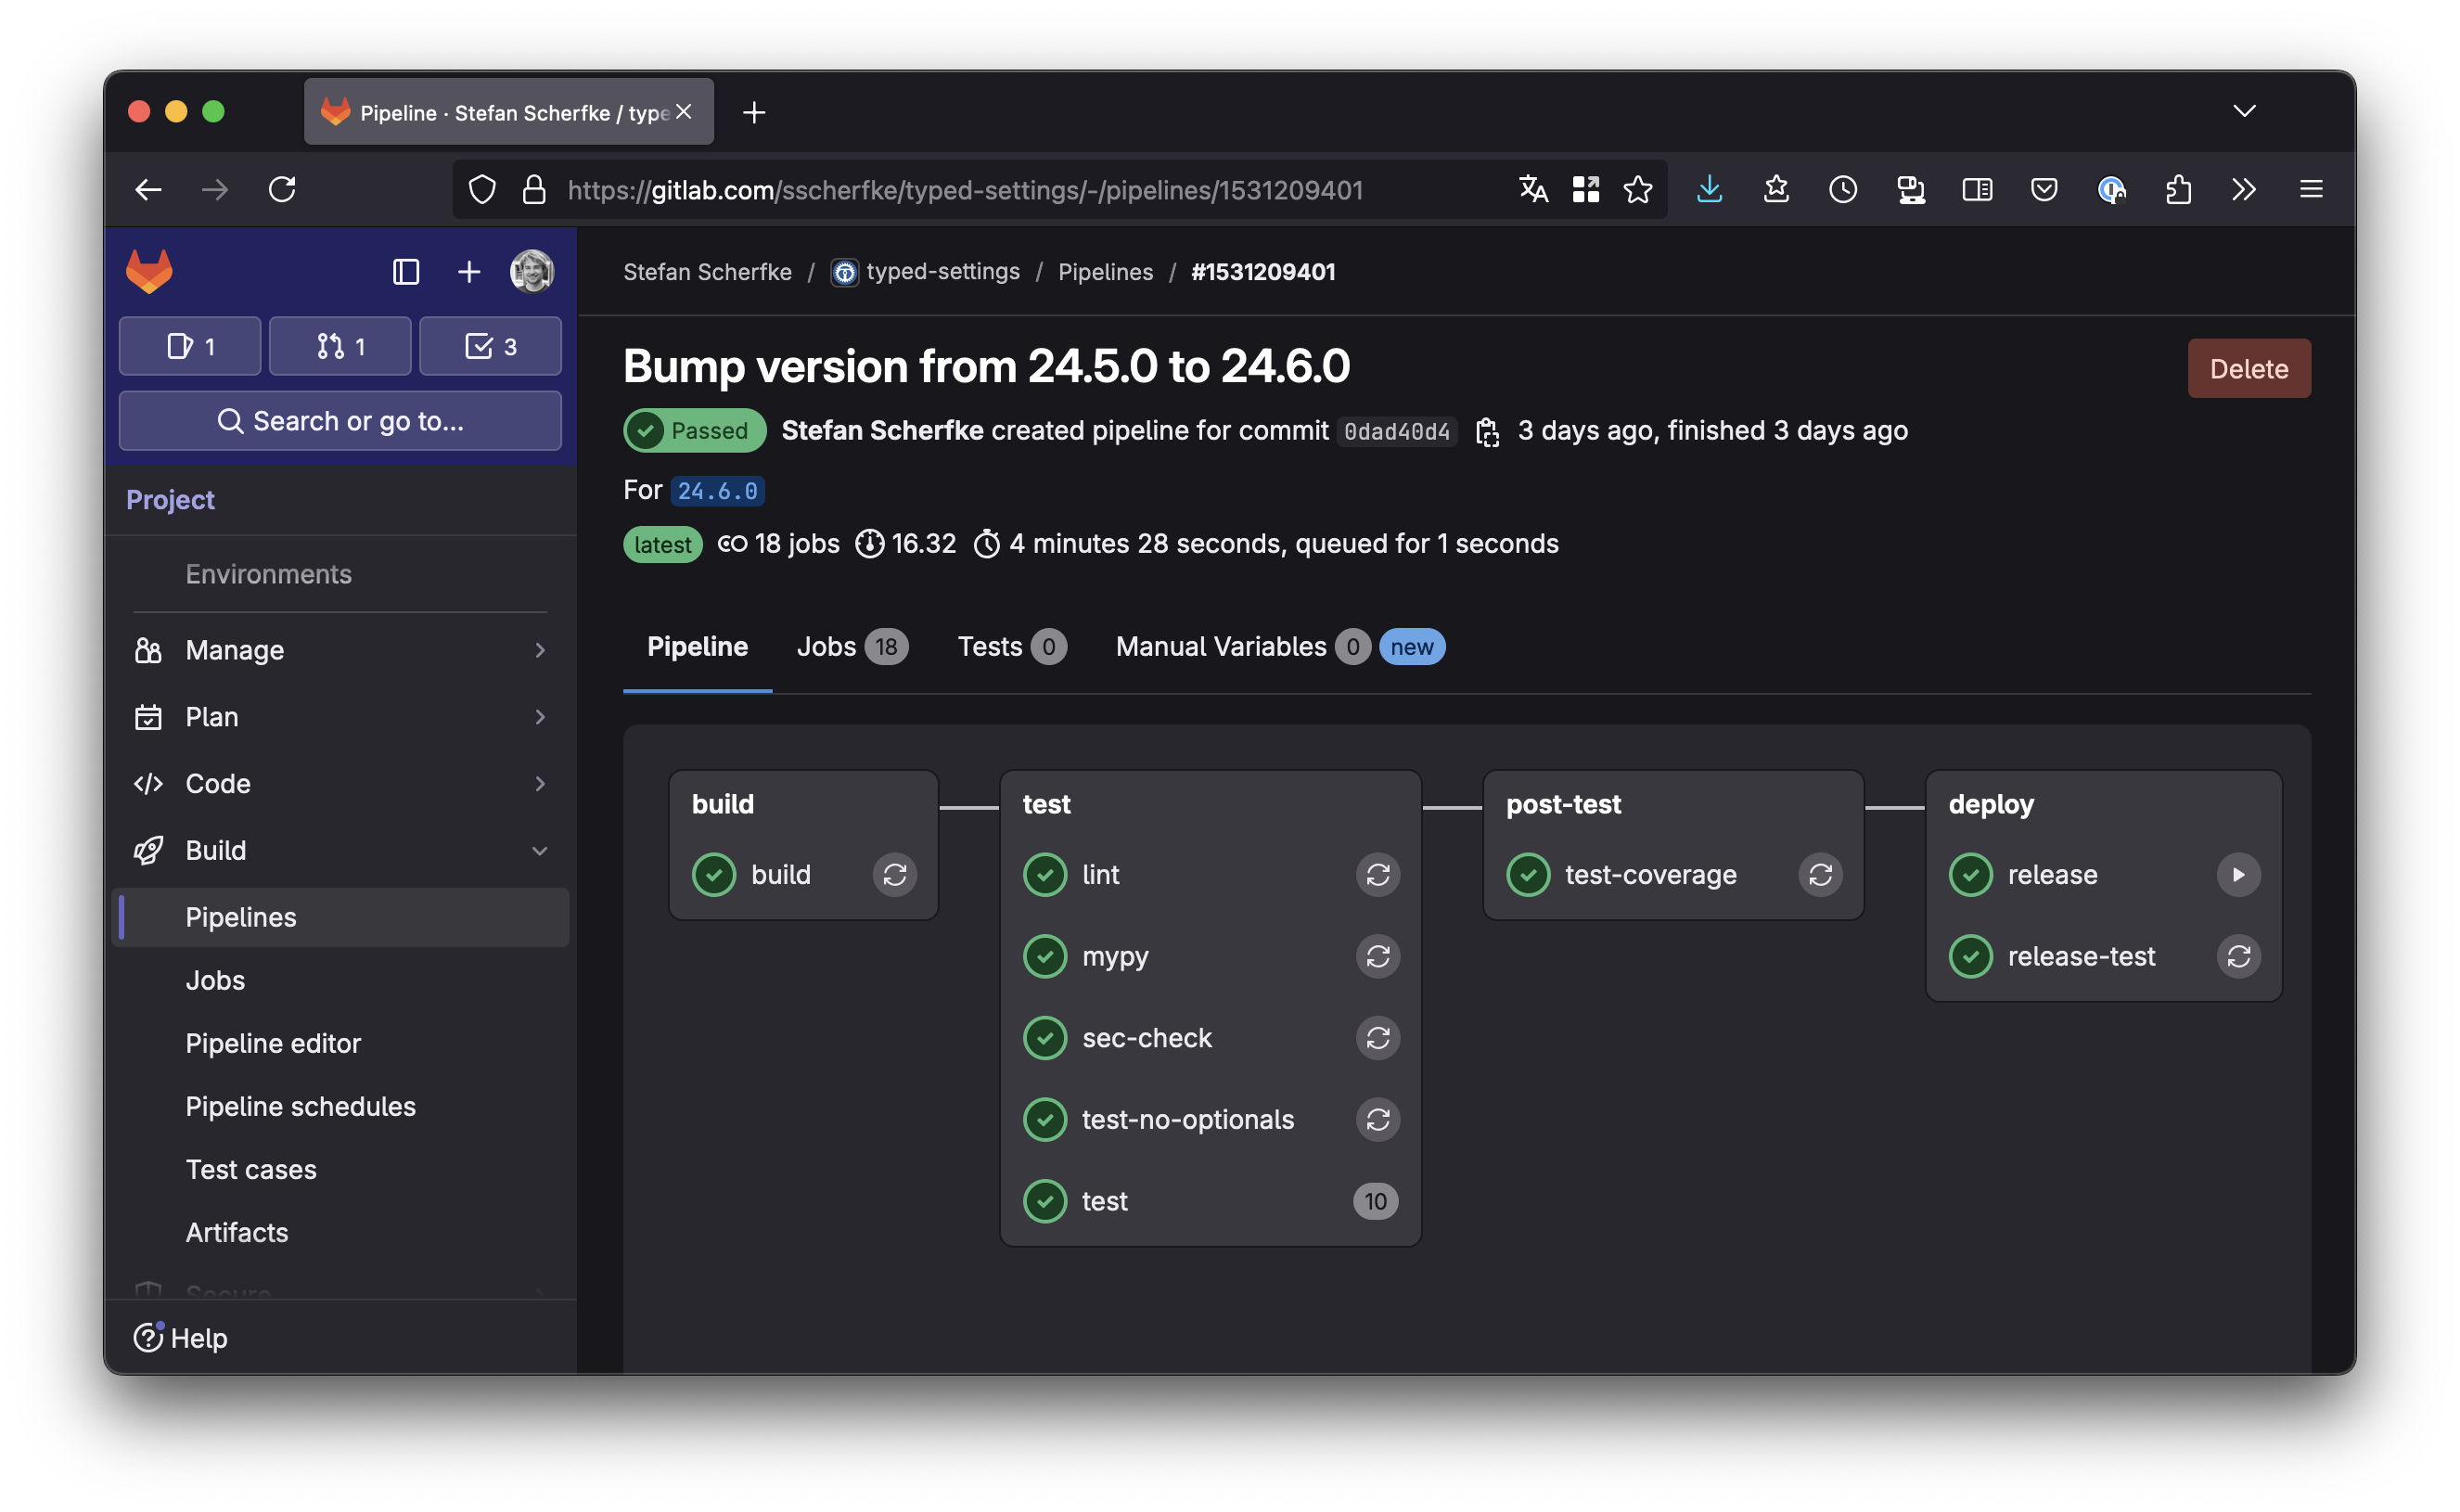
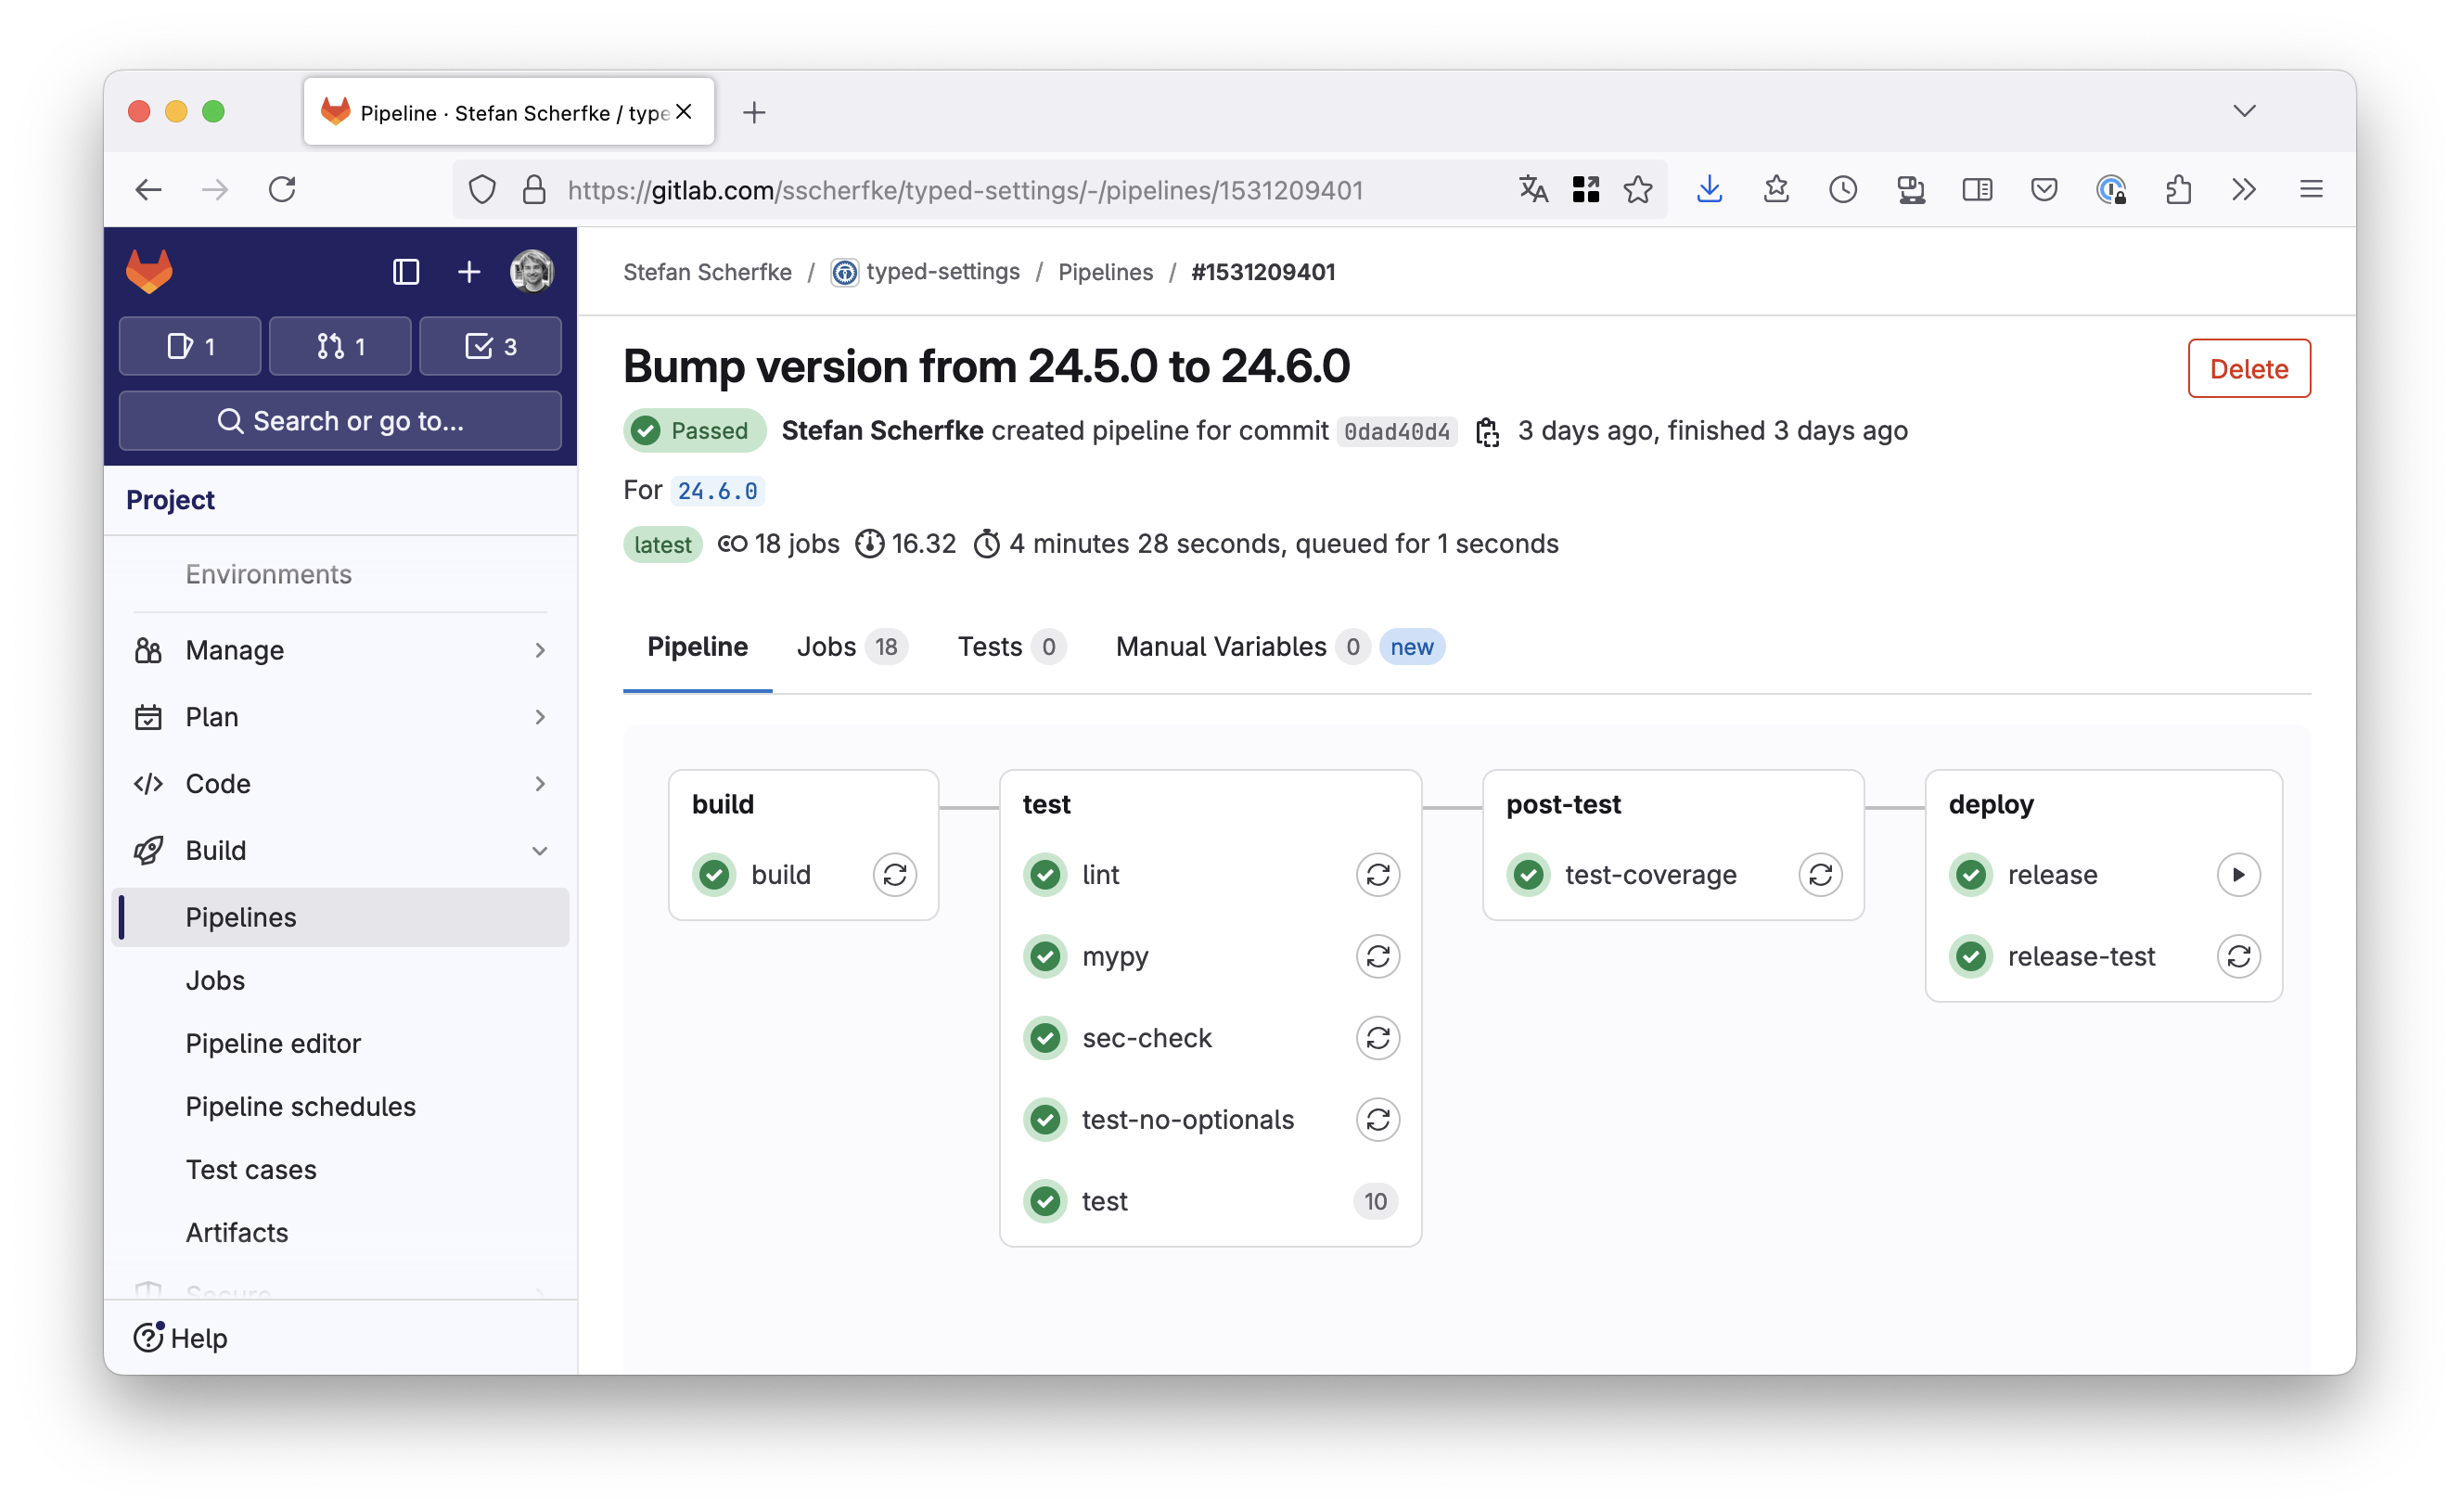
If you run into any problems, you can
- check if the settings on PyPI match your GitLab project,
- read the Trusted Publishers docs,
- read the GitLAB CI/CD YAML syntax reference,
- read the docs for GitLab environments and GitLab OIDC authentication.
You can leave comments over at Mastodon or Bluesky.
And, as promised, here is the complete (but still minimal) .gitlab-ci.yml from the snippets above.
If you want to see a real-world example,
you can take a look at Typed Settings pipeline definition.
# .gitlab-ci.yml
stages:
  - 'build'
  # - 'test'
  # - ...
  - 'deploy'
build:
  stage: 'build'
  script:
    - 'uv build --out-dir=dist'
  artifacts:
    paths:
      - 'dist/'
.release-base:
# Abstract base job for "release" jobs.
# Extending jobs must define the following variables:
# - PYPI_OIDC_AUD: Audience for the ID token that GitLab issues to the pipeline job
# - PYPI_OIDC_URL: PyPI endpoint for retrieving a publish token with GitLab’s ID token
# - UV_PUBLISH_URL: PyPI endpoint for the actual upload
stage: 'deploy'
id_tokens:
PYPI_ID_TOKEN:
aud: '$PYPI_OIDC_AUD'
script:
- >-
resp="$(curl -X POST "${PYPI_OIDC_URL}" -d "{\"token\":\"${PYPI_ID_TOKEN}\"}")"
- >-
publish_token="$(python -c "import json; print(json.load('${resp}')['token'])")"
- 'uv publish --token "$publish_token"'
- 'version="$(uv run --with hatch-vcs hatchling version)"'
- 'echo -e "\033[34;1mPackage on PyPI:\033[0m ${CI_ENVIRONMENT_URL}${version}/"'
release-test:
extends: '.release-base'
rules:
- if: '$CI_COMMIT_BRANCH == $CI_DEFAULT_BRANCH || $CI_COMMIT_TAG'
environment:
name: 'release-test'
url: 'https://test.pypi.org/project/typed-settings/'
variables:
PYPI_OIDC_AUD: 'testpypi'
PYPI_OIDC_URL: 'https://test.pypi.org/_/oidc/mint-token'
UV_PUBLISH_URL: 'https://test.pypi.org/legacy/'
release:
extends: '.release-base'
rules:
- if: '$CI_COMMIT_TAG'
environment:
name: 'release'
url: 'https://pypi.org/project/typed-settings/'
variables:
PYPI_OIDC_AUD: 'pypi'
PYPI_OIDC_URL: 'https://pypi.org/_/oidc/mint-token'
UV_PUBLISH_URL: 'https://upload.pypi.org/legacy/'